7 Tips for Getting a Quick Likeness
Art Awe
Have you ever watched a really good Paris street portrait artist working their magic?
To capture someone’s likeness quickly, from life, is one of the most challenging aspects of portraiture, right up there with learning the anatomy of the figure.
Recently I sketched at a corporate event, drawing sitters for 20 minutes each. In preparation, I did lots of timed practice runs, and hoovered up a bunch of demos & theory. Here’s what I learned and how:
First attempt
To get the gig, instead of submitting a CV, applicants had to send an example, in any technique.

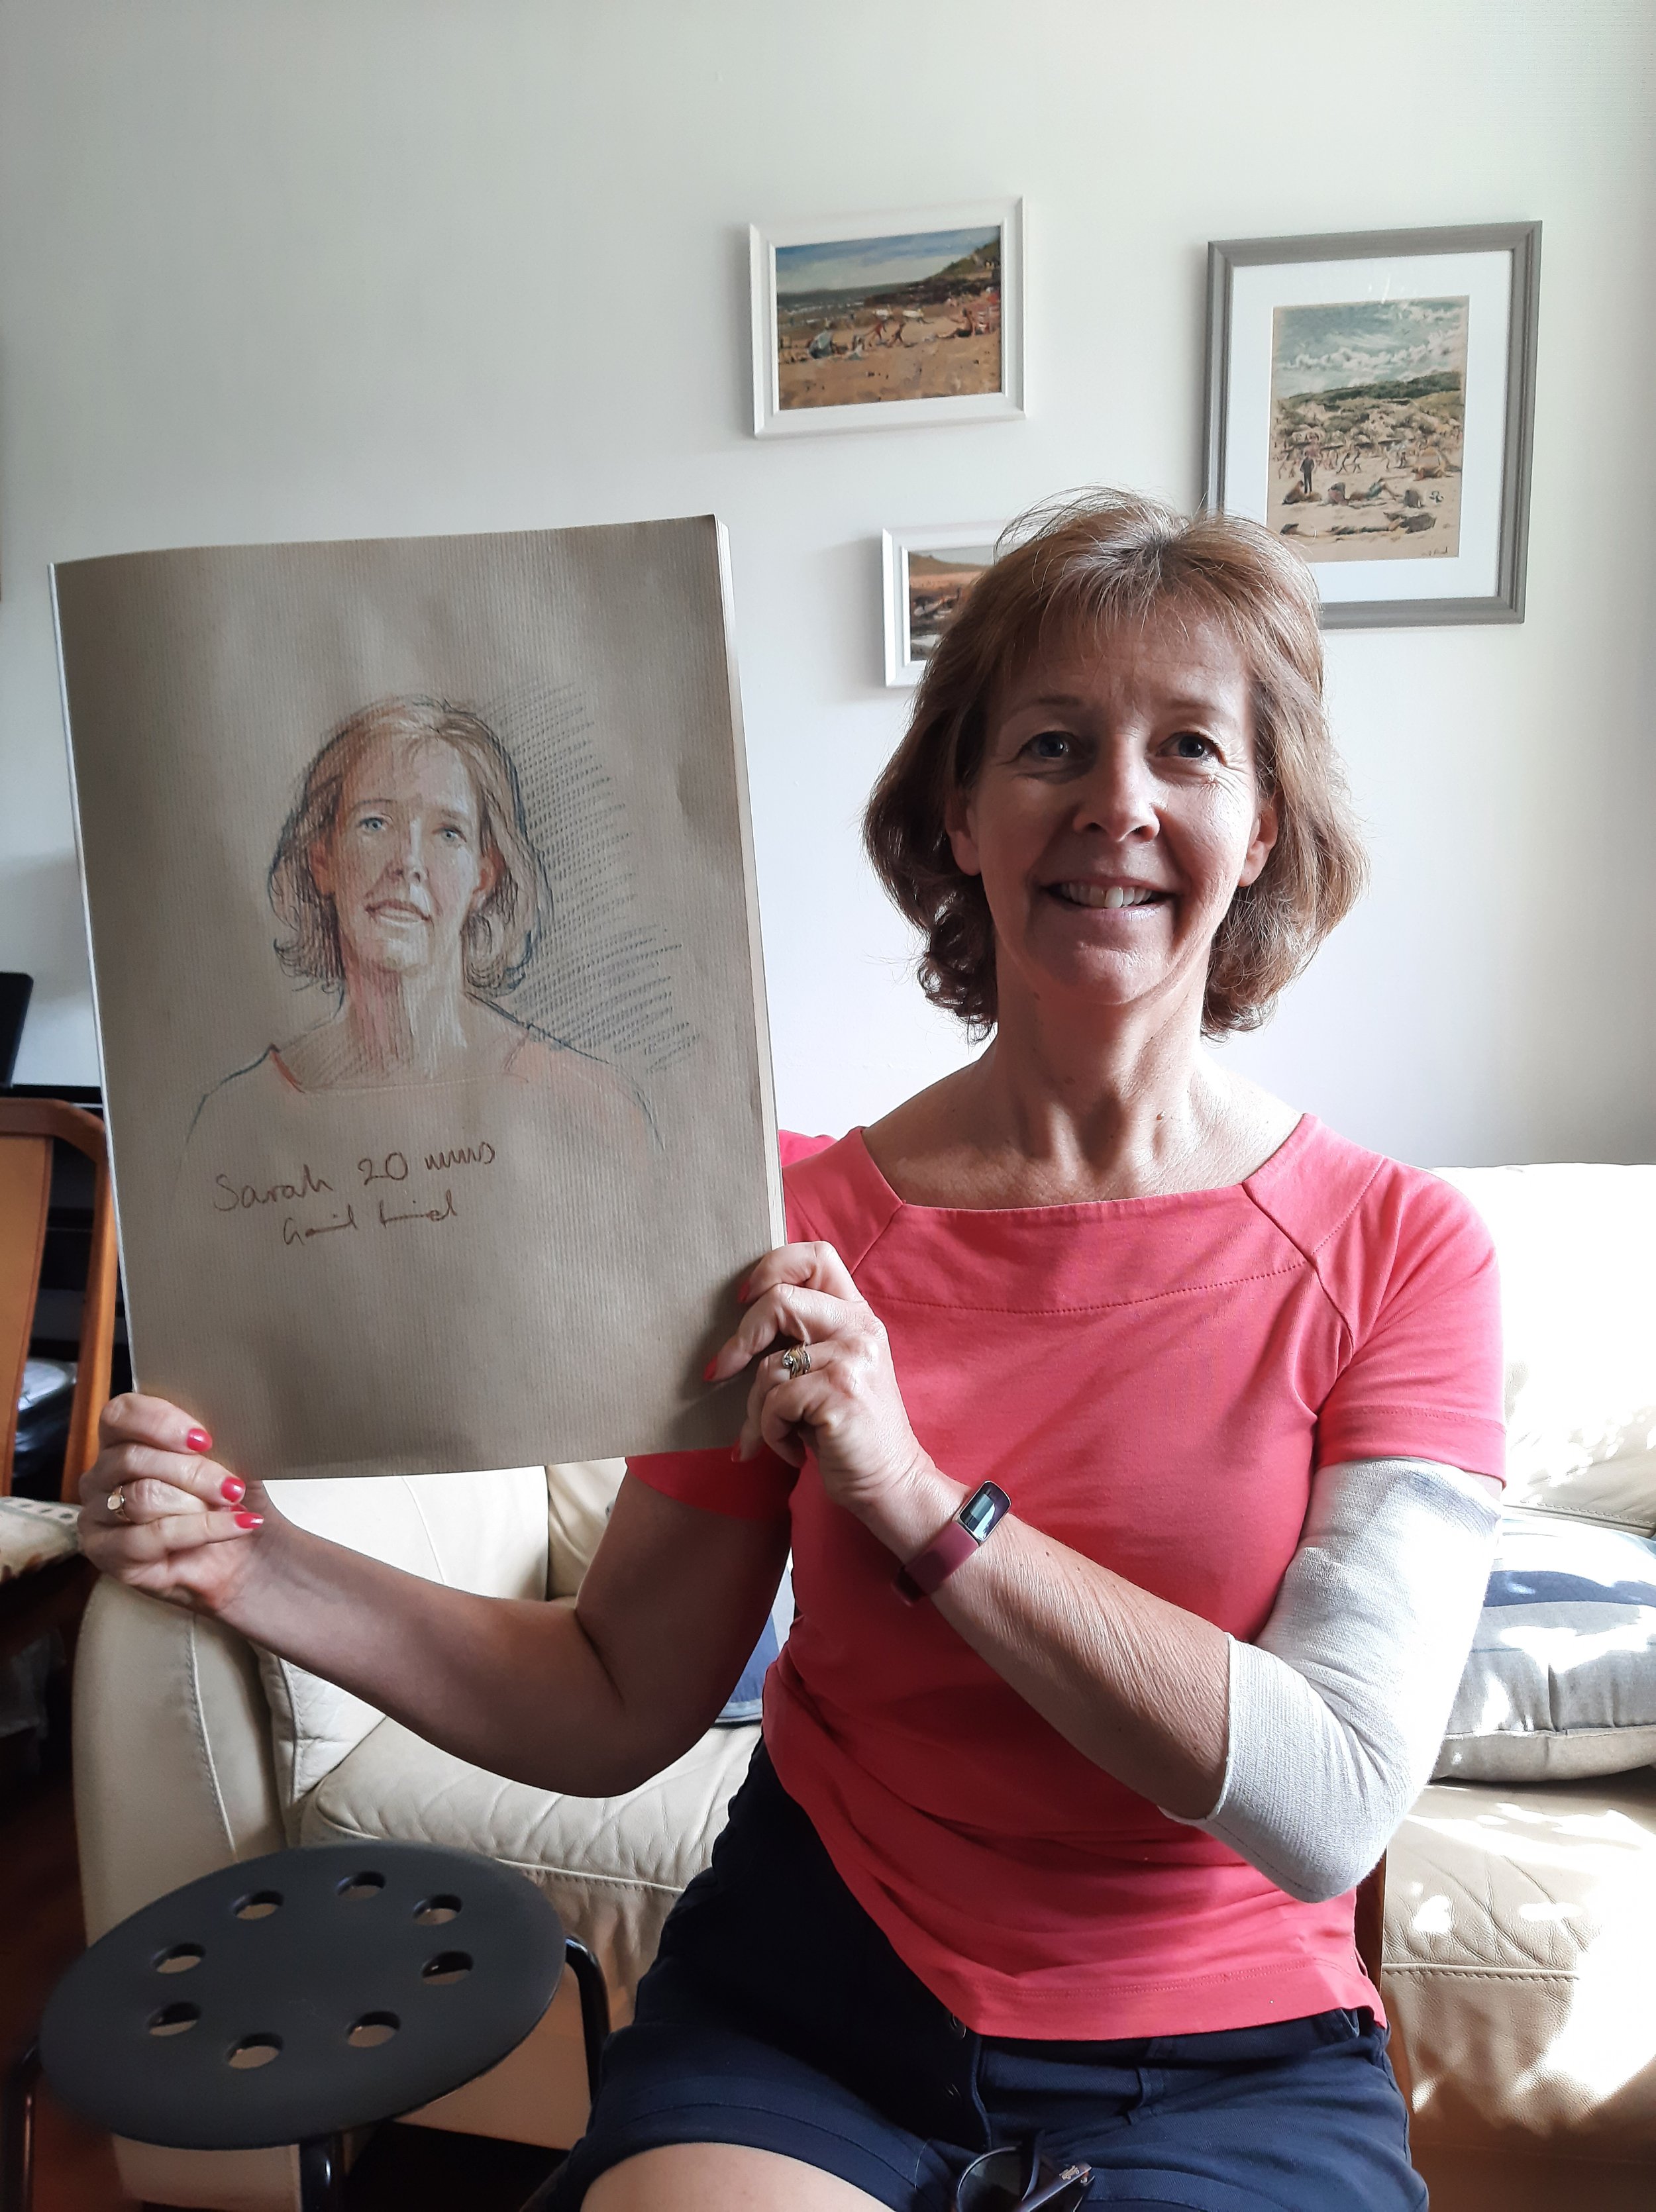
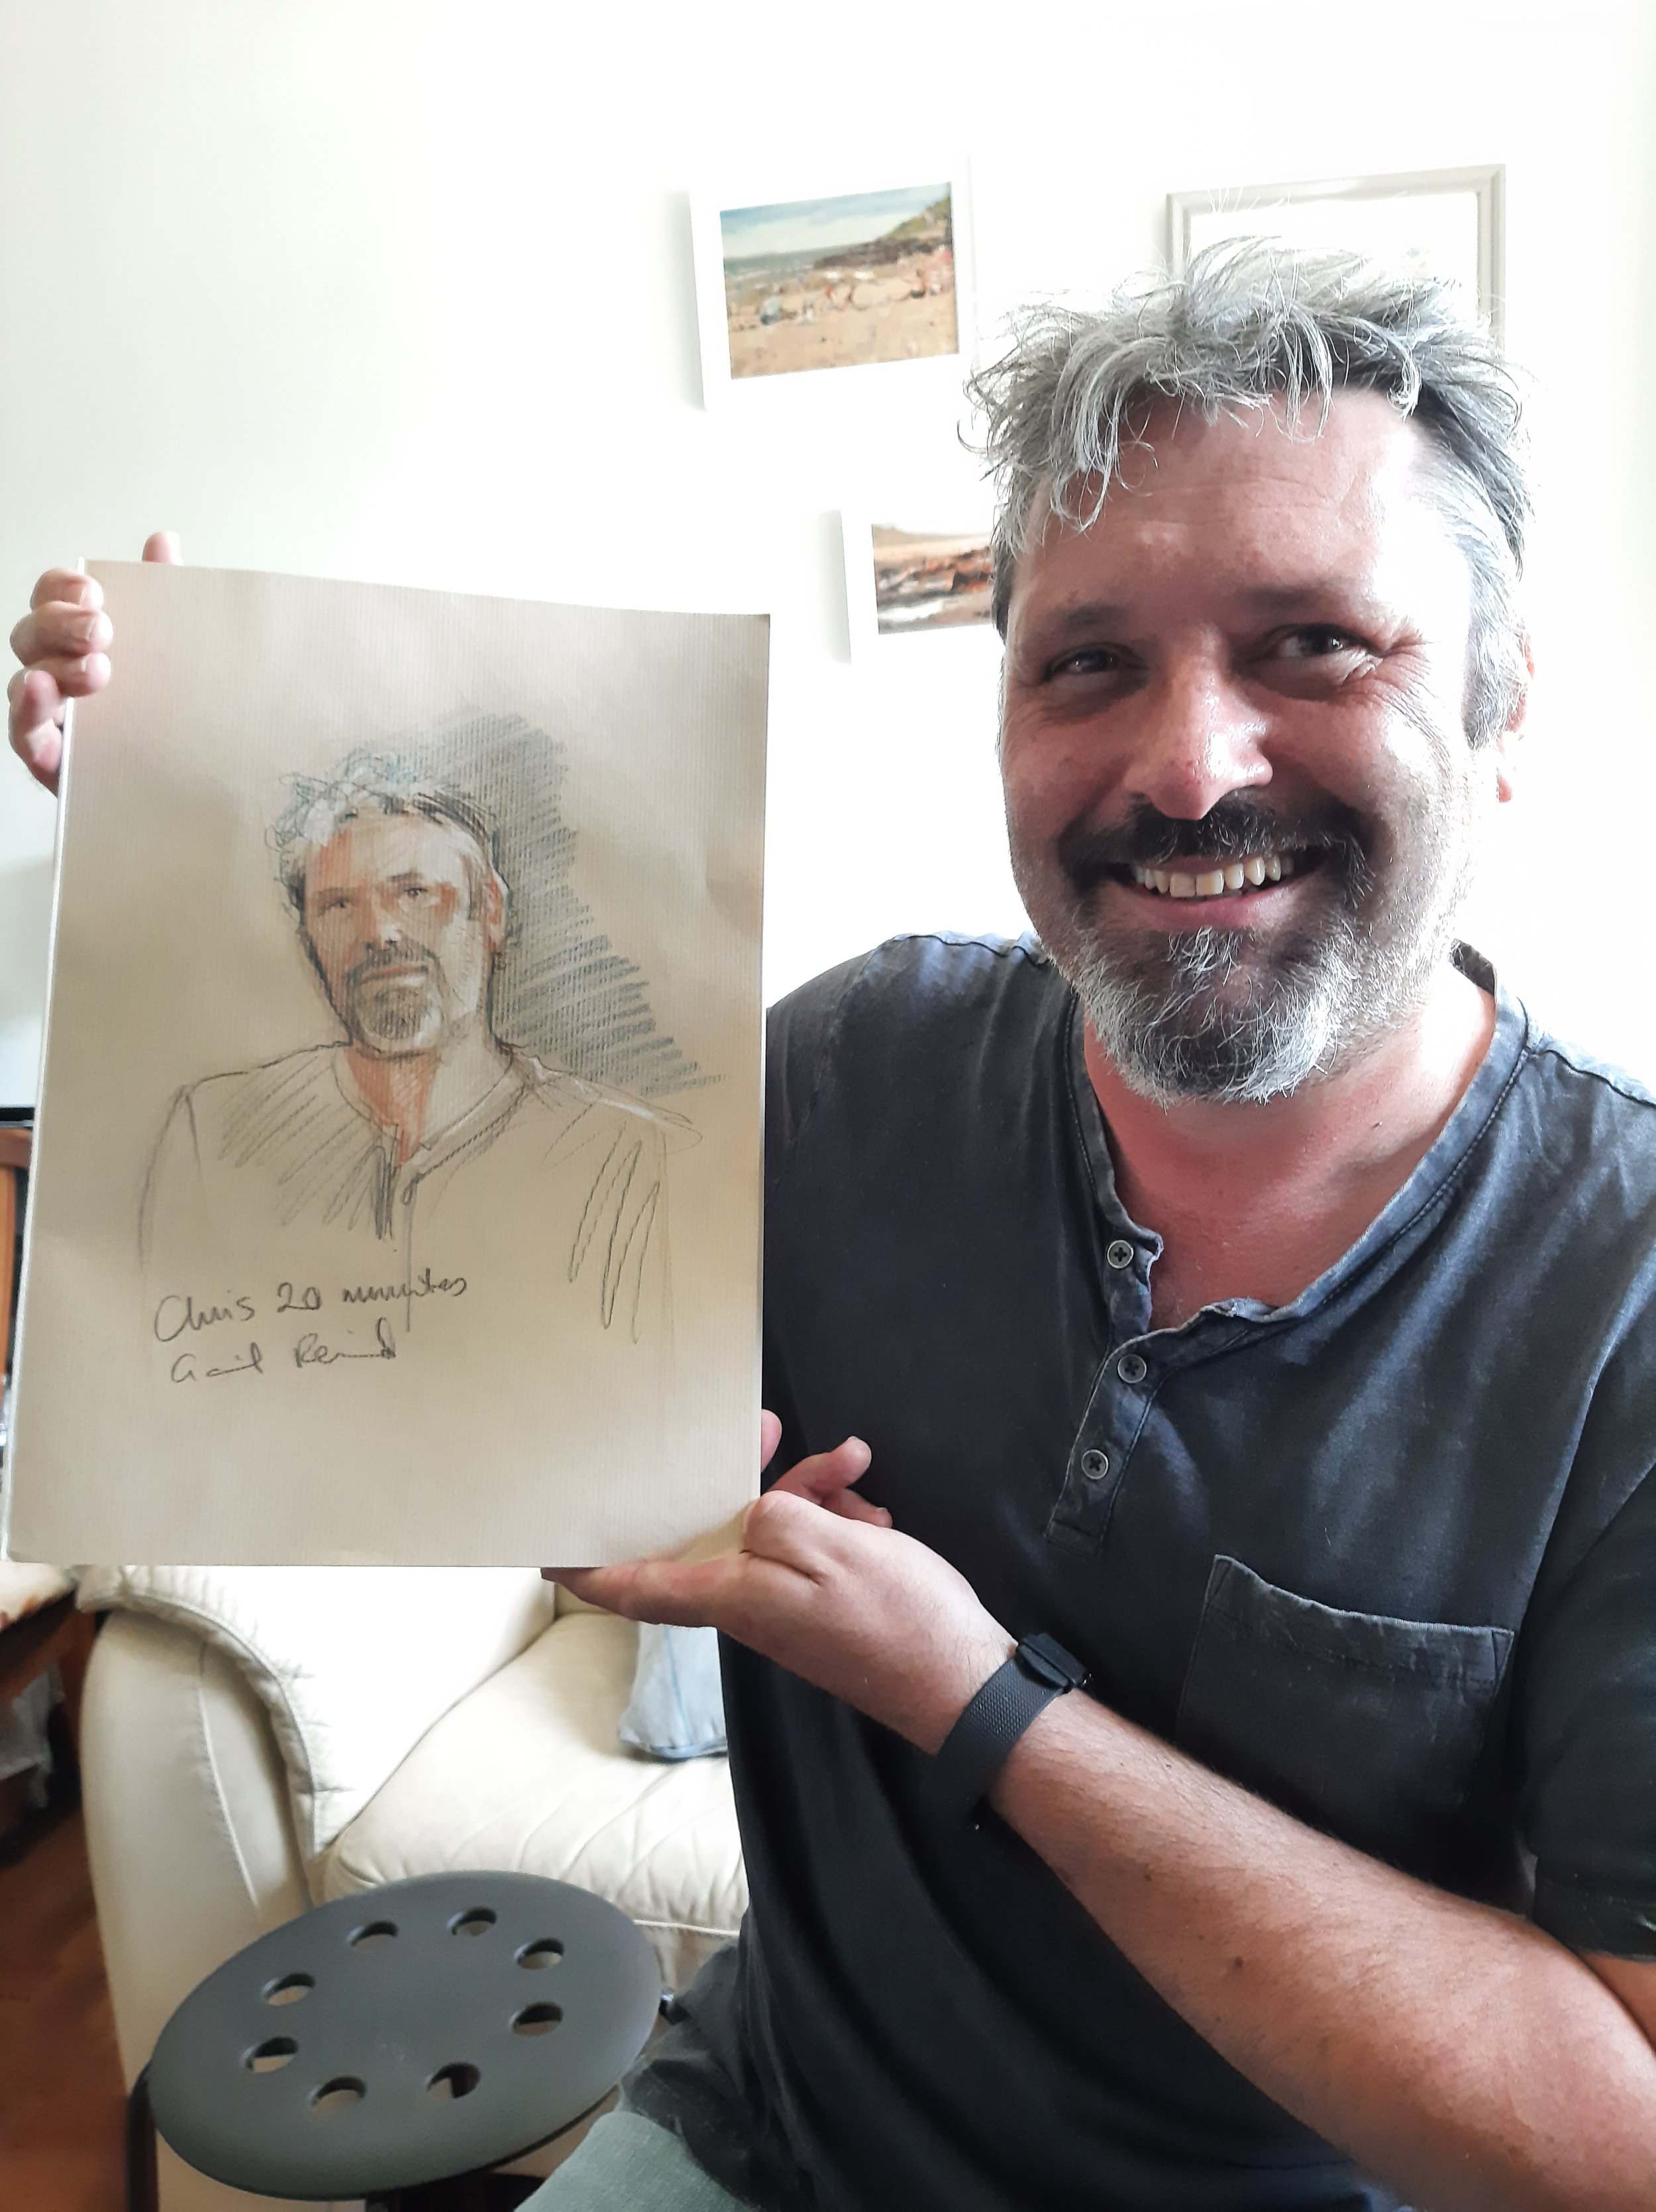
Izzi and Leon's 20 minute portraits
Given that the event was likely to be ‘suits’, I asked Izzi and Leon to don their school blazers, and sit motionless for 20 minutes. Perhaps unsurprisingly for teenagers, they aced this task in the face of my frenzied activity. As Izzi’s portrait seemed the more conventional likeness, I submitted that. On hearing my application had been successfuI, I had an instant attack of Imposter Syndrome (even more than usual!)
TIP 0 - Practice!
That was when it sunk in that for consistent presentable results under pressure I’d need A LOT of practice. But that’s not really a tip is it?!
I thought I’d do a few practice runs, and that would suffice. Pre-Covid, I had done regular ‘short pose’ drawing from professional models. Although the understanding of light and proportion definitely helps, drawing from models comes with no pressure to get a likeness, or indeed to produce anything ‘for’ anyone. Also, professionals are very good at being still!
The next few portraits demonstrated my inconsistency, in spades. Luckily the sitters were close friends who understood the results may be neither flattering, nor resemble them! About 1 in 4 was a decent likeness, and 1 in 4 was really quite insulting to the sitter.
TIP 1 - Set a timer for less than the full pose.
As I was aiming to finish in 20 minutes, I set my timer for 18. This gives a reminder when it’s time to accelerate the finishing touches.


Panic Stations
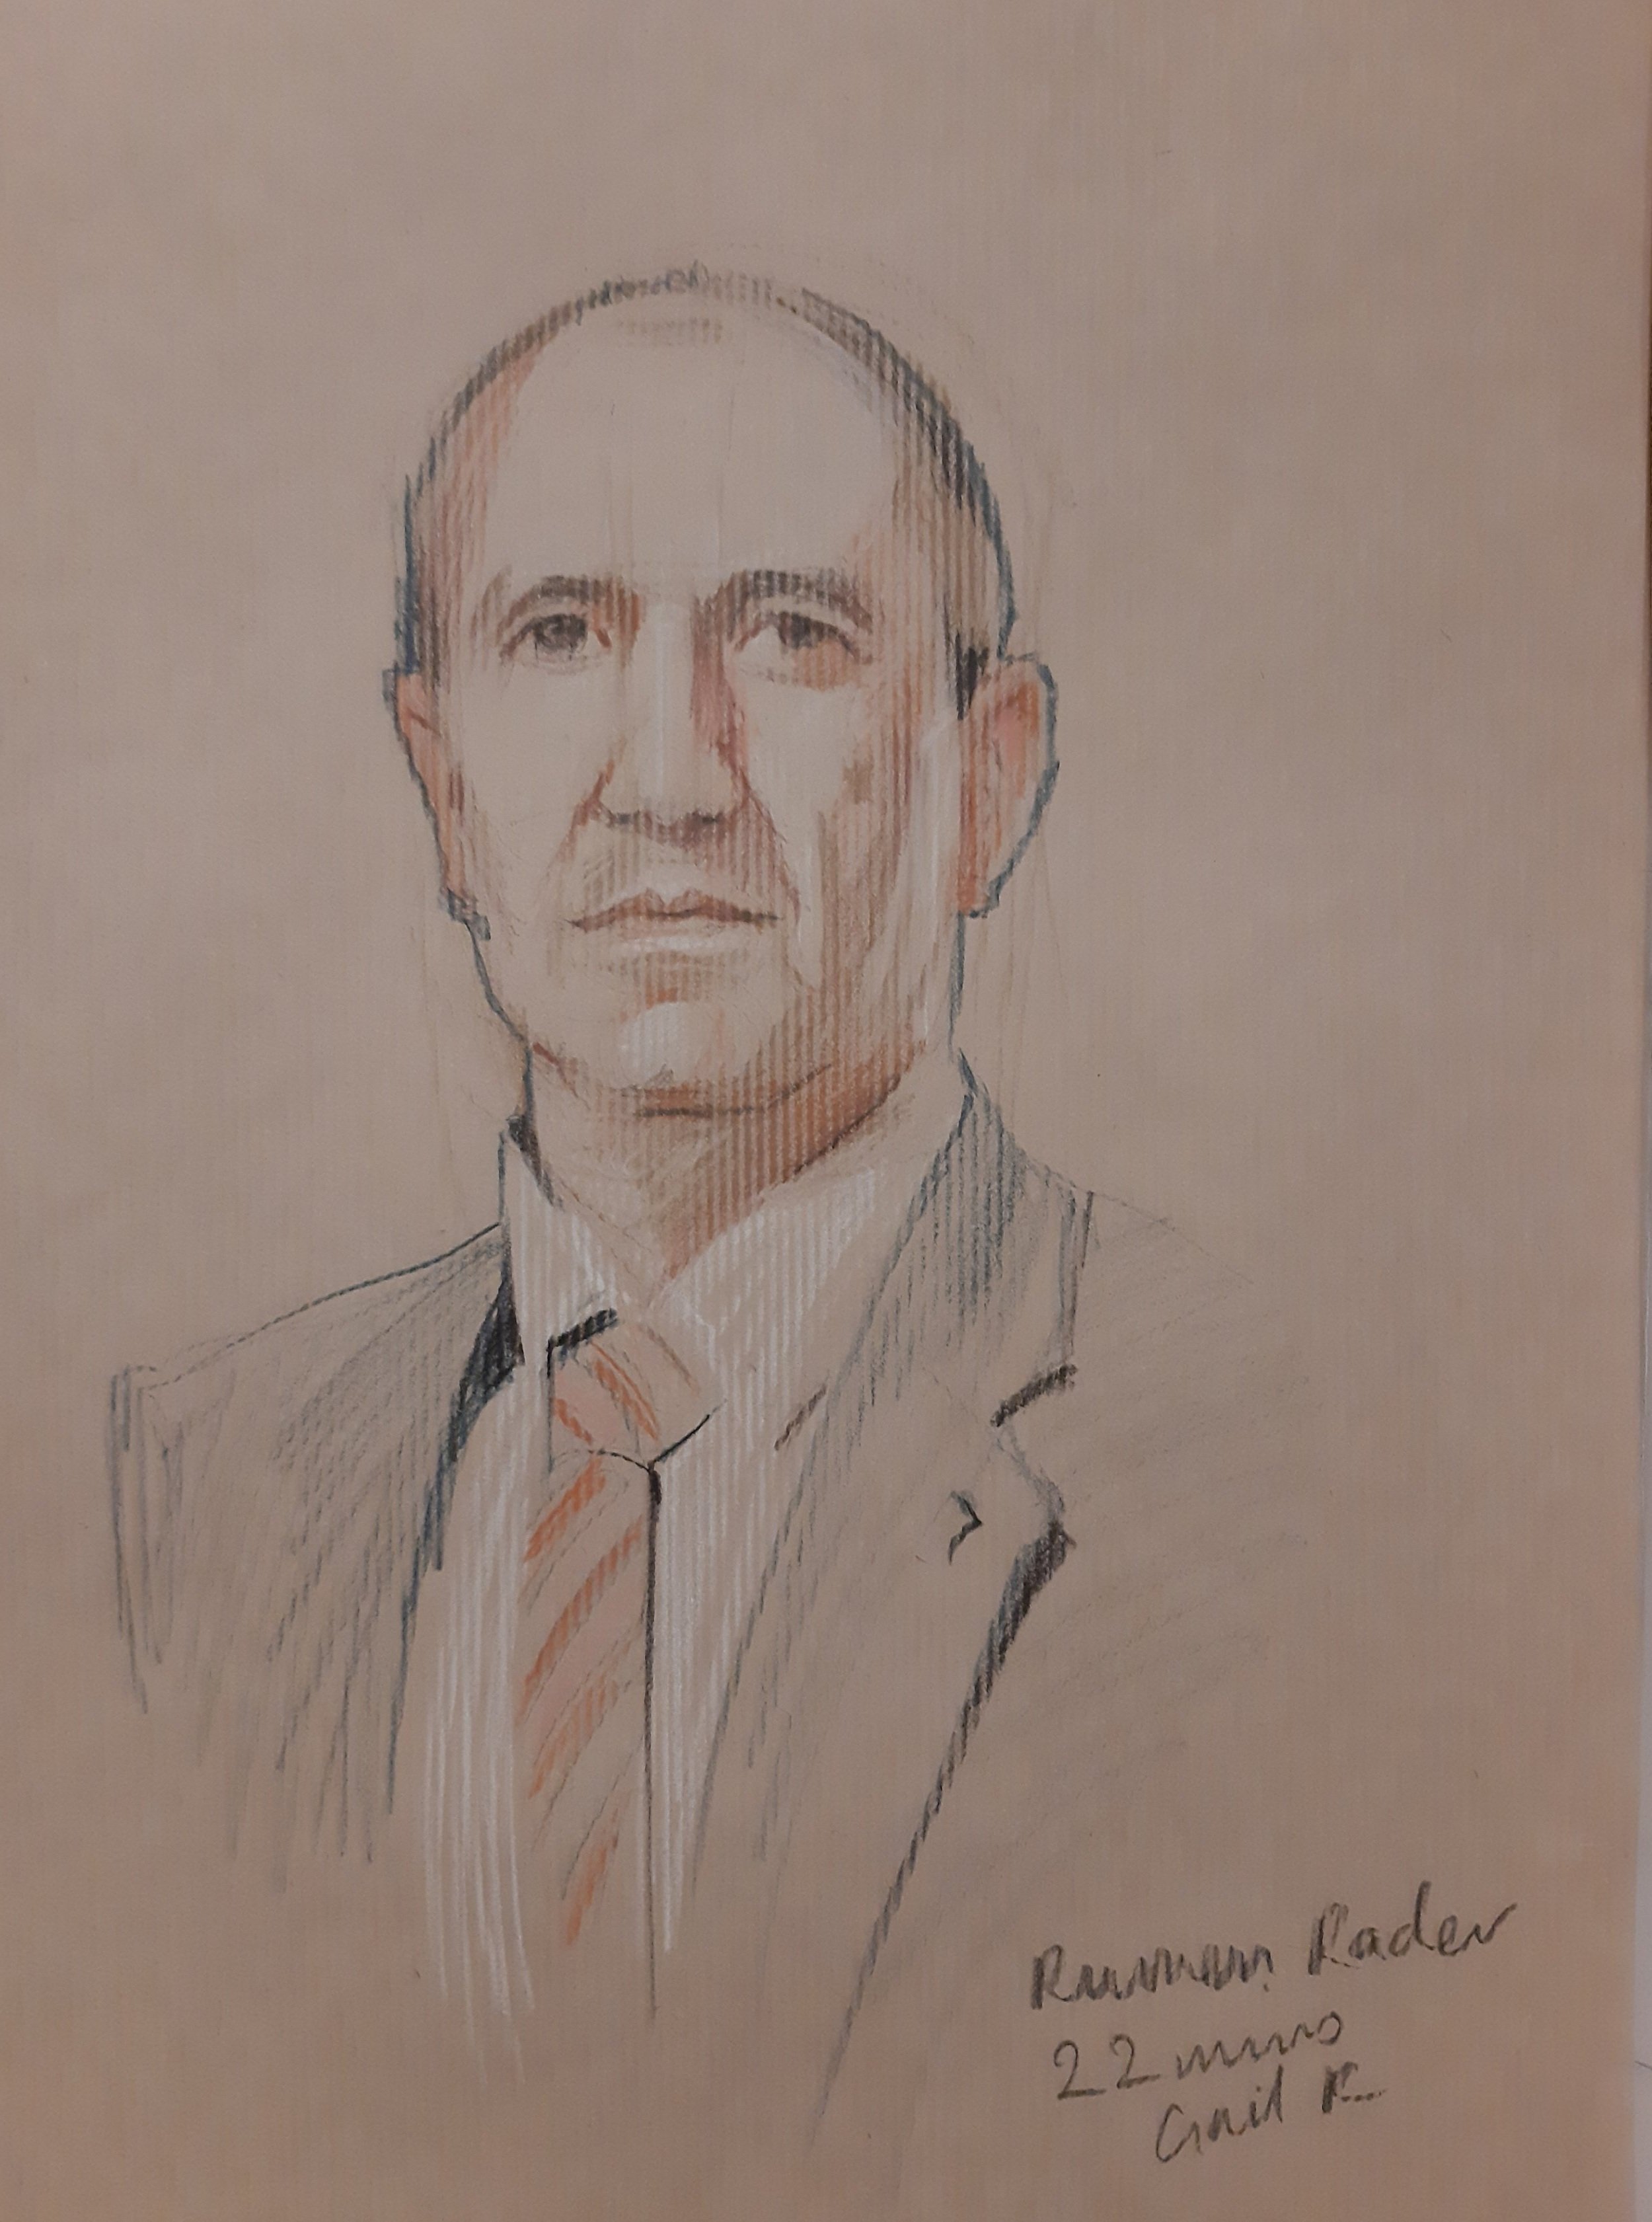
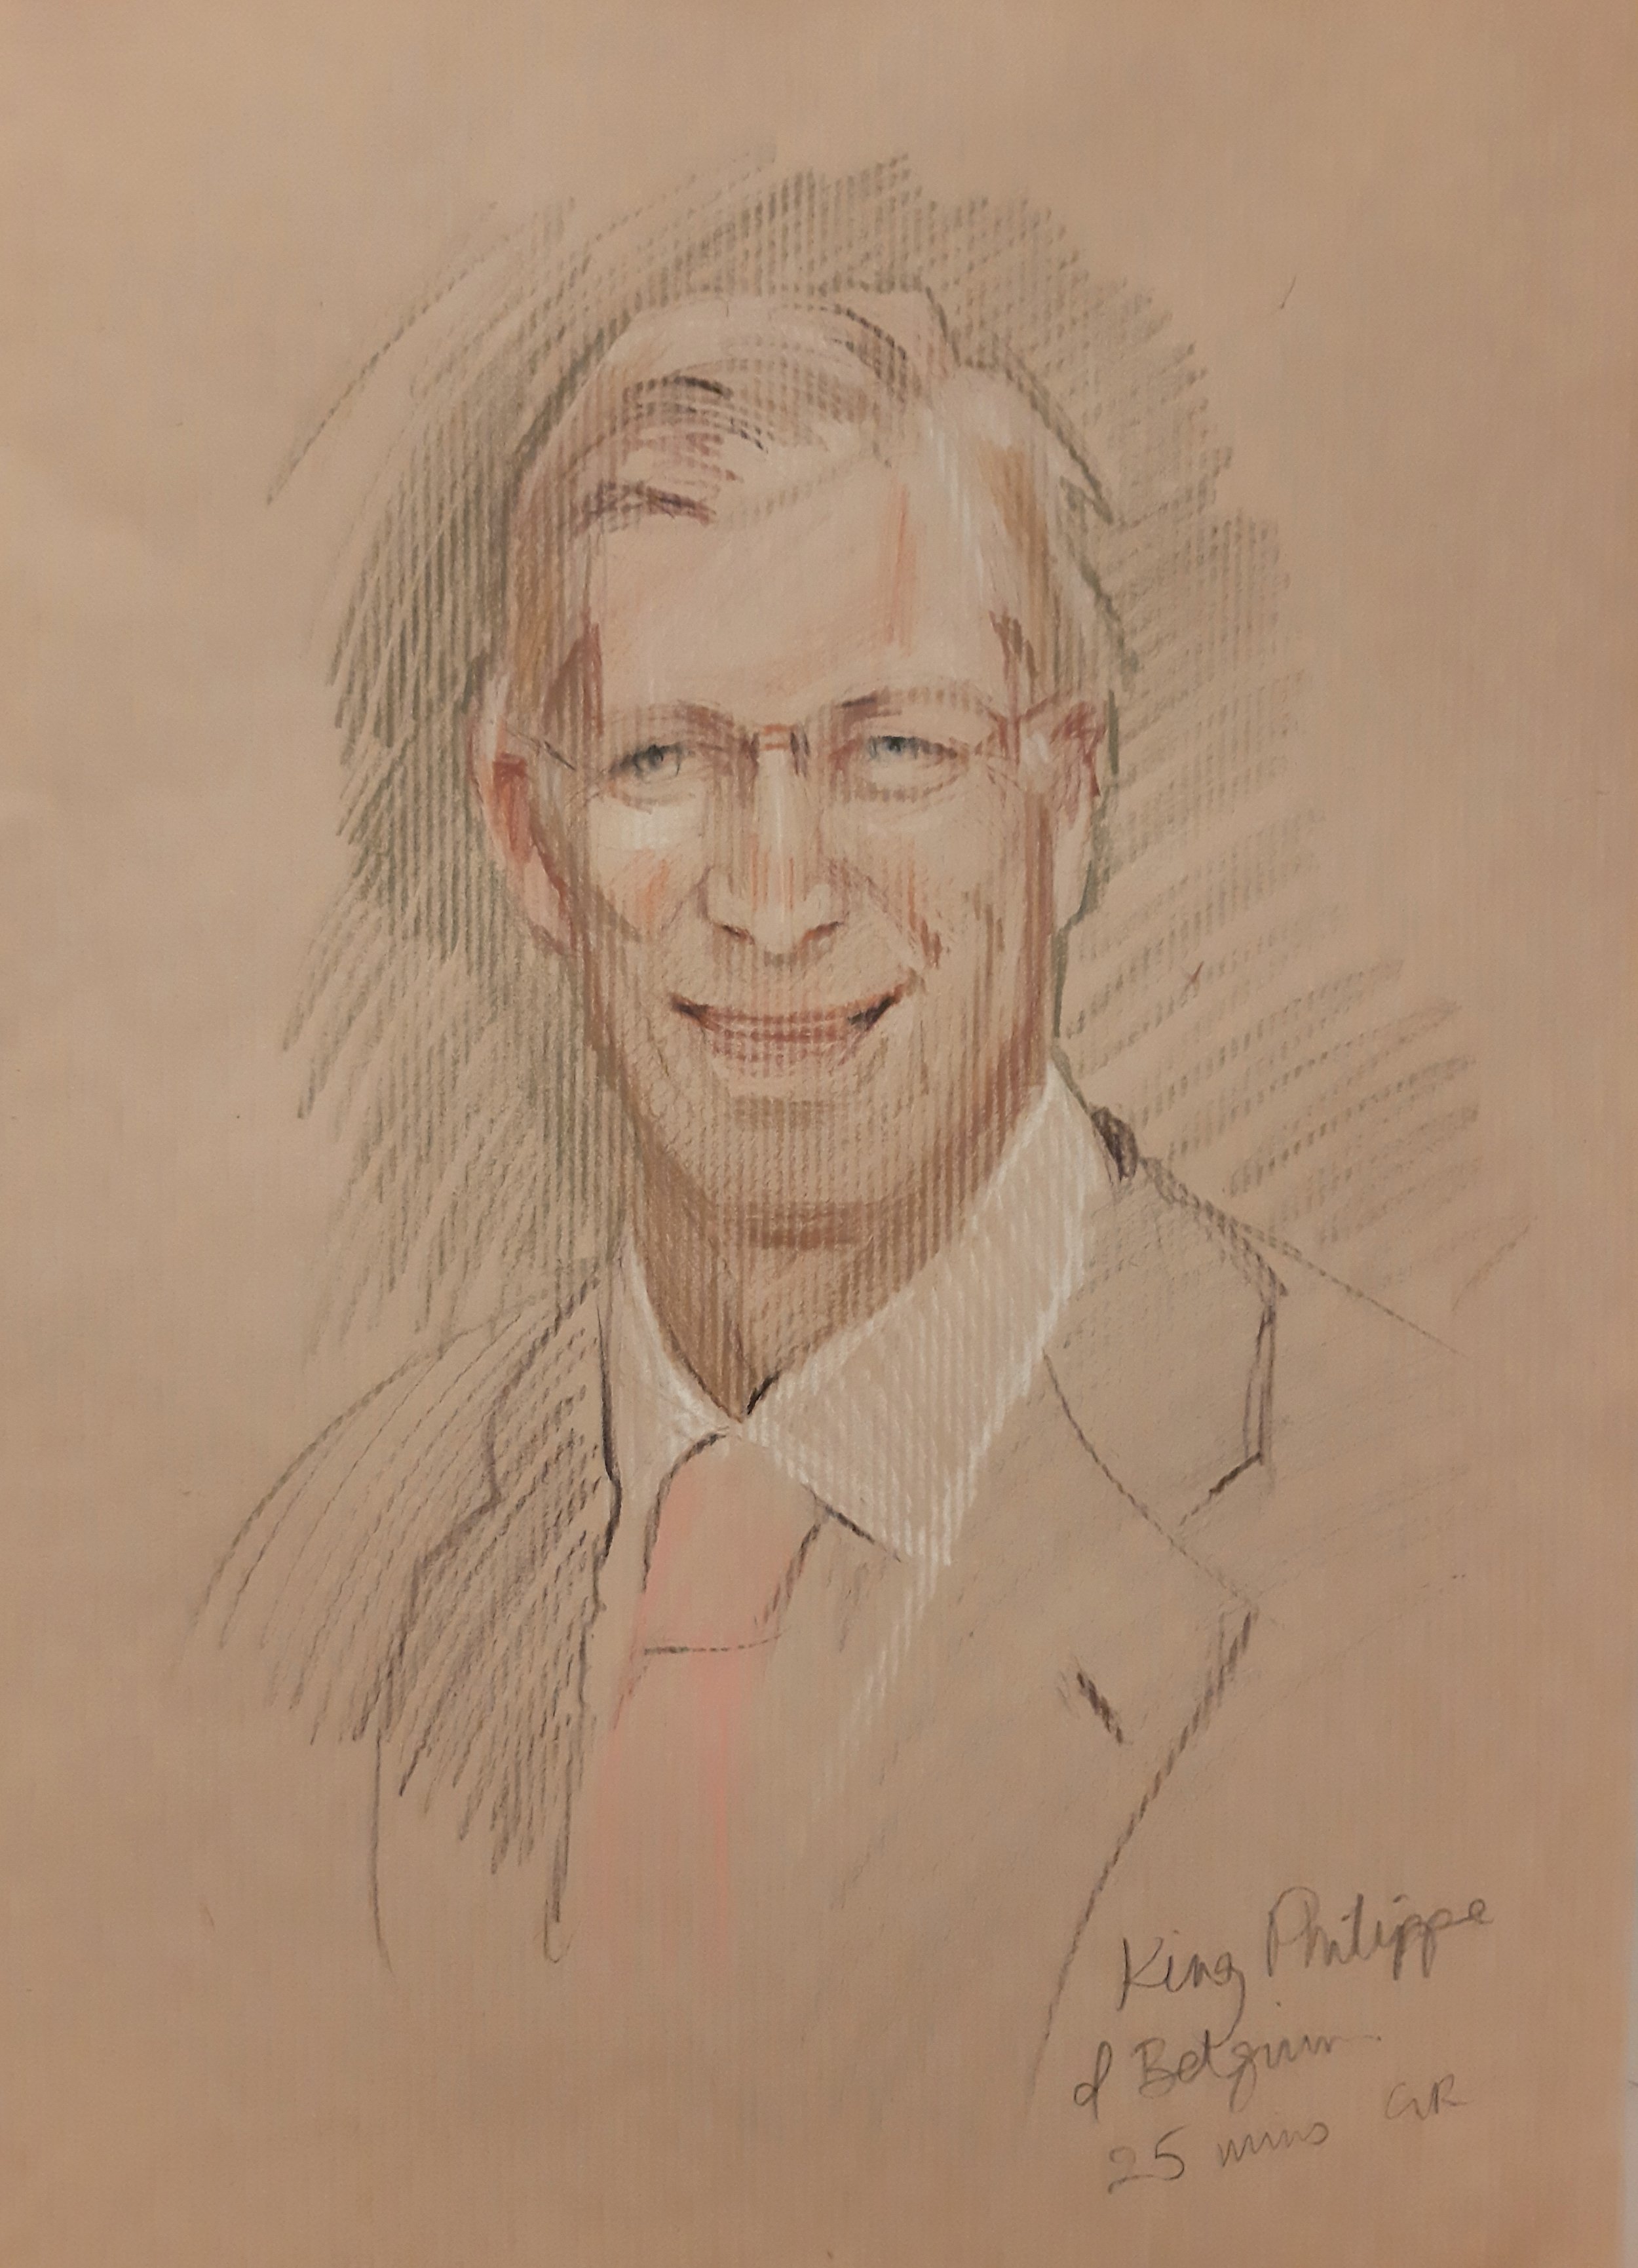
I retreated to drawing from photos (decided that heads of state from the Nato website had more to worry about than whether my drawing did them justice). This was quite good for working out a ‘system’ without the pressure of taking a sitter’s time/worrying about expectations.
TIP 2 - Use paper that helps you
I use textured toned (kraft) paper. The texture really seems to work with clothing, and also helps ‘scrape’ the pigment from the pencils quicker. The tone is a more forgiving background colour, and a good warm mid-tone base from which to build flesh, shadows and highlights.

TIP 3 - Loomis and Reilly methods
There are some industry standard illustration methods to break down the face, two popular 20th Century ones are by Reilly and Loomis. I’d tried them a bit, but was put off by the inherent standardisation and symmetry. It had never quite sunk in how helpful they could be. Once you have nailed an ‘average, default’ face, you can get a likeness by noting how an individual deviates from that, rather than by observing from scratch. You can also learn some prioritised landmarks, that are key markers of bone structure and feature placement. I ended up mashing together several techniques, here’s a 20 minute demo, talking and showing the system I evolved. (This blog was written on the Platinum Jubilee weekend, hence the subject!)
Feeling around in the dark
So I asked a few more friends, and did a few more from life.
Tip 4 - Allow for your sitter’s needs
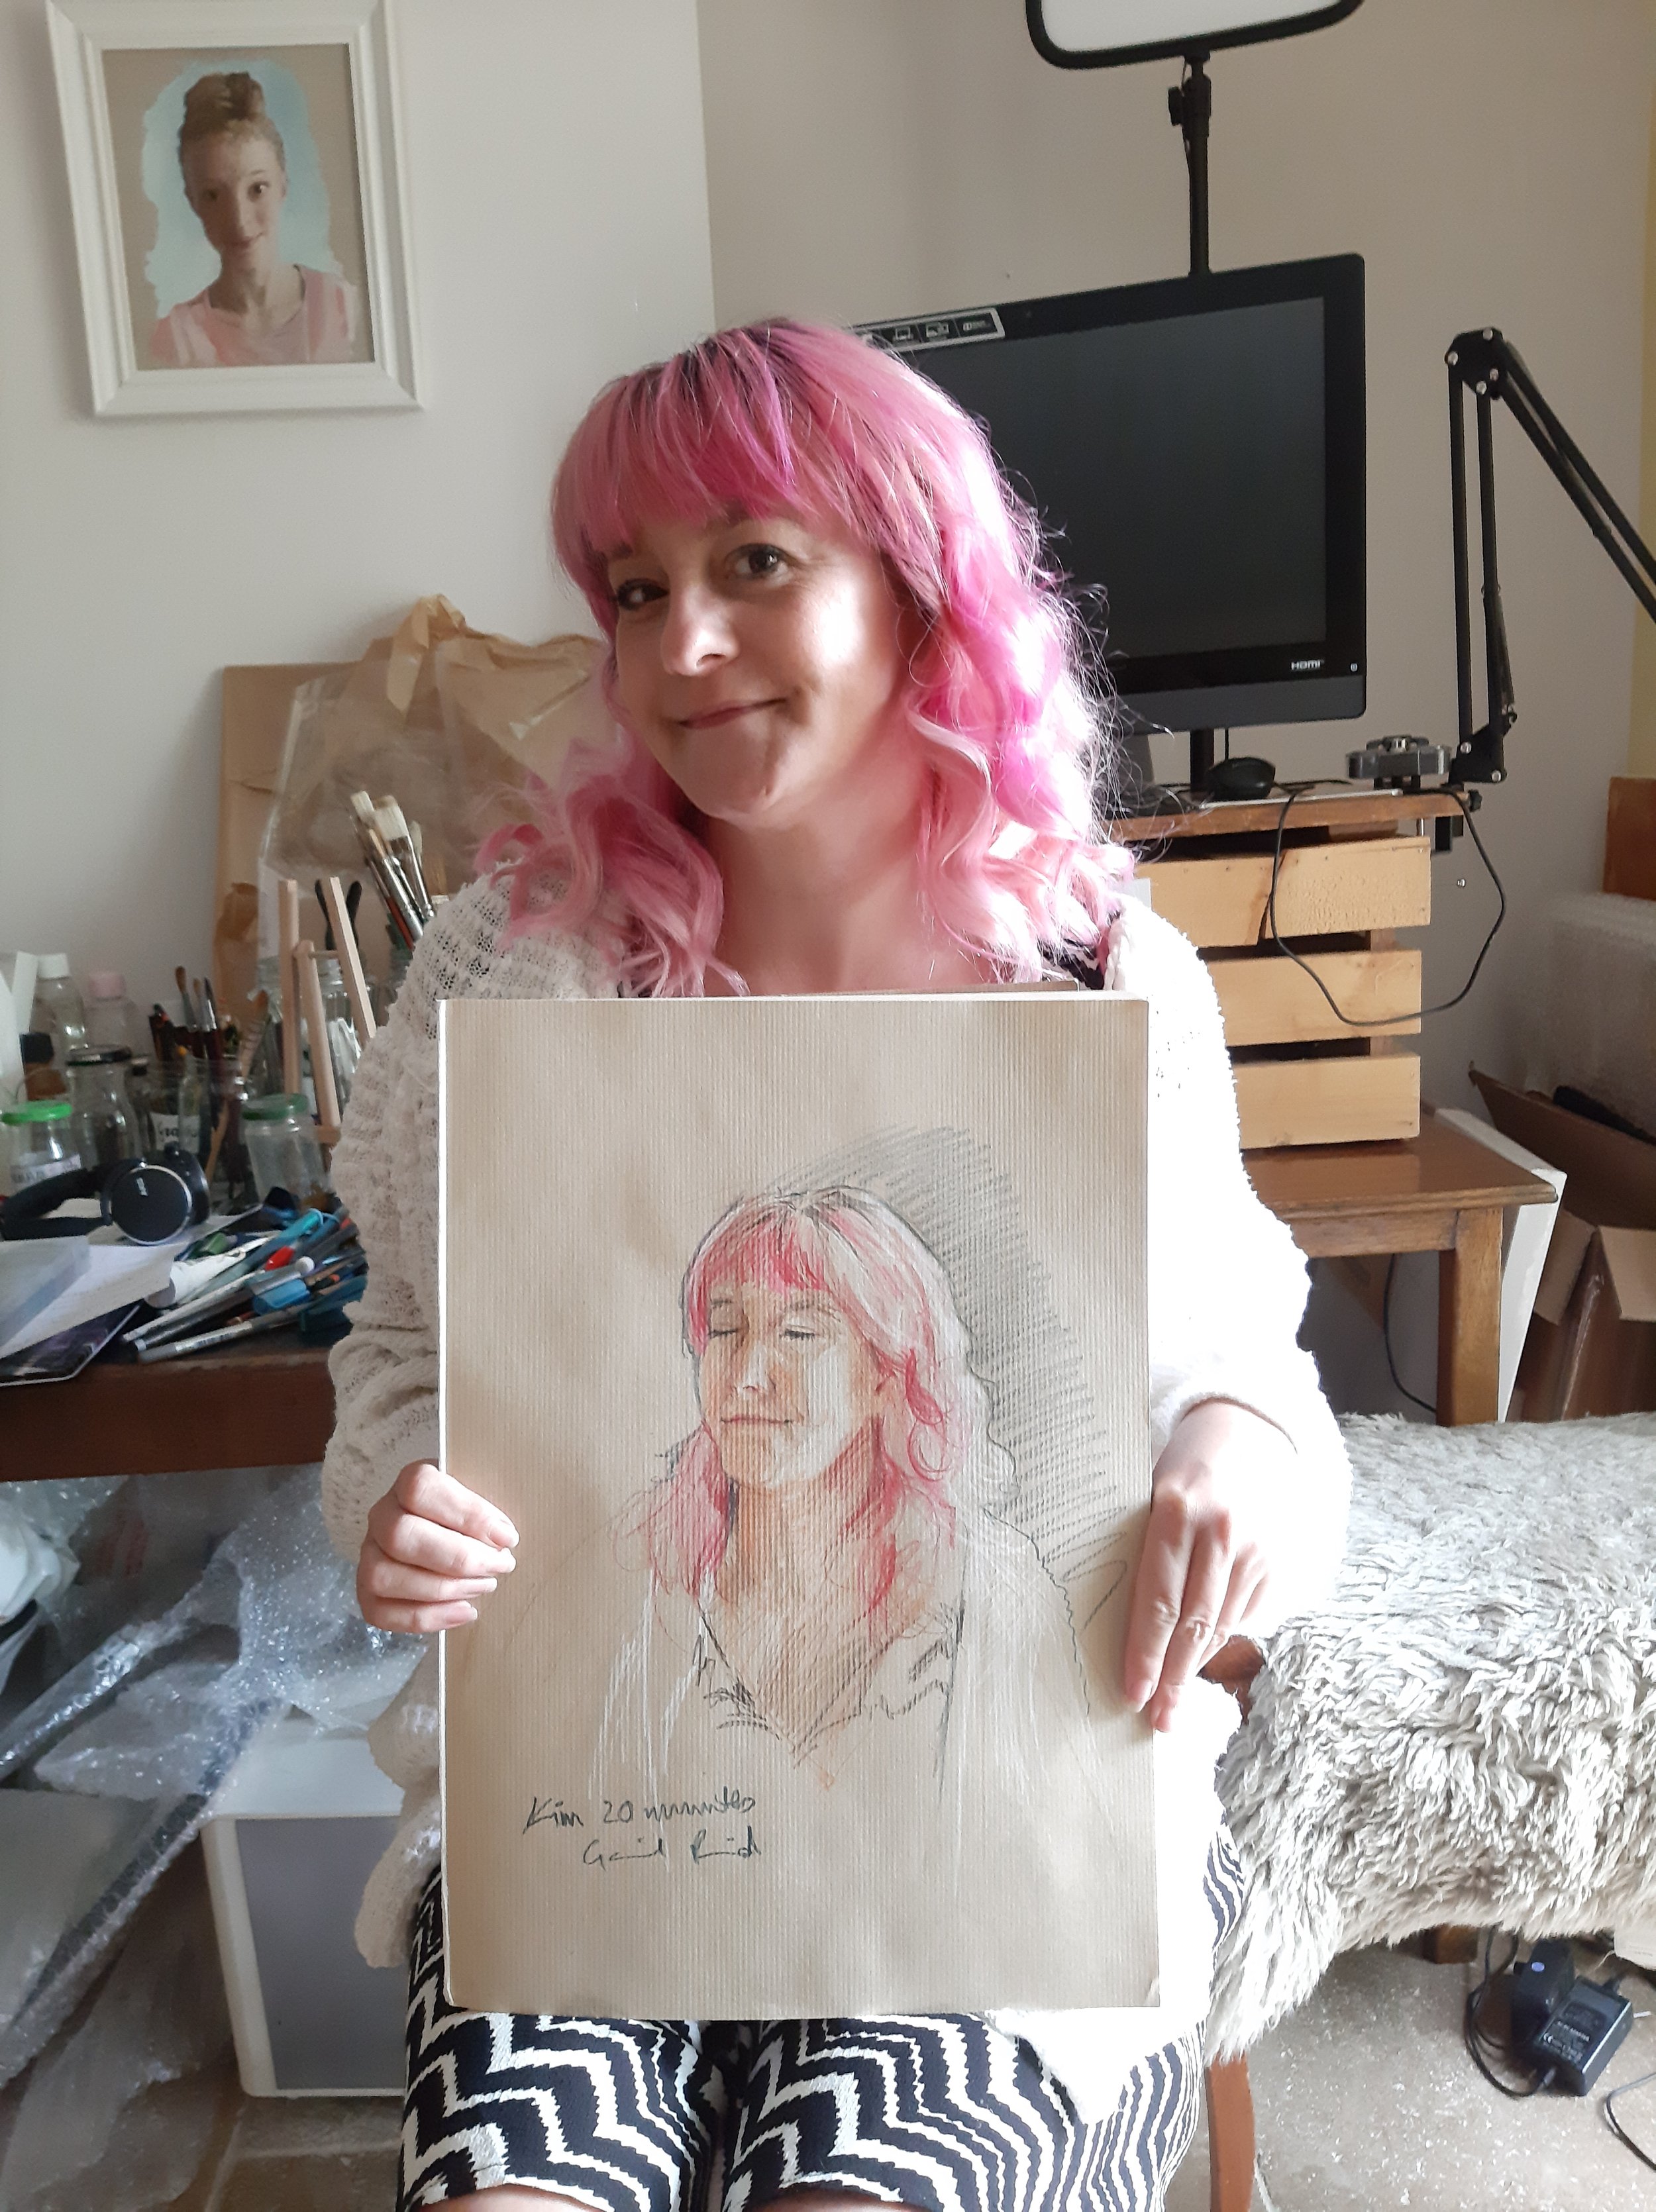
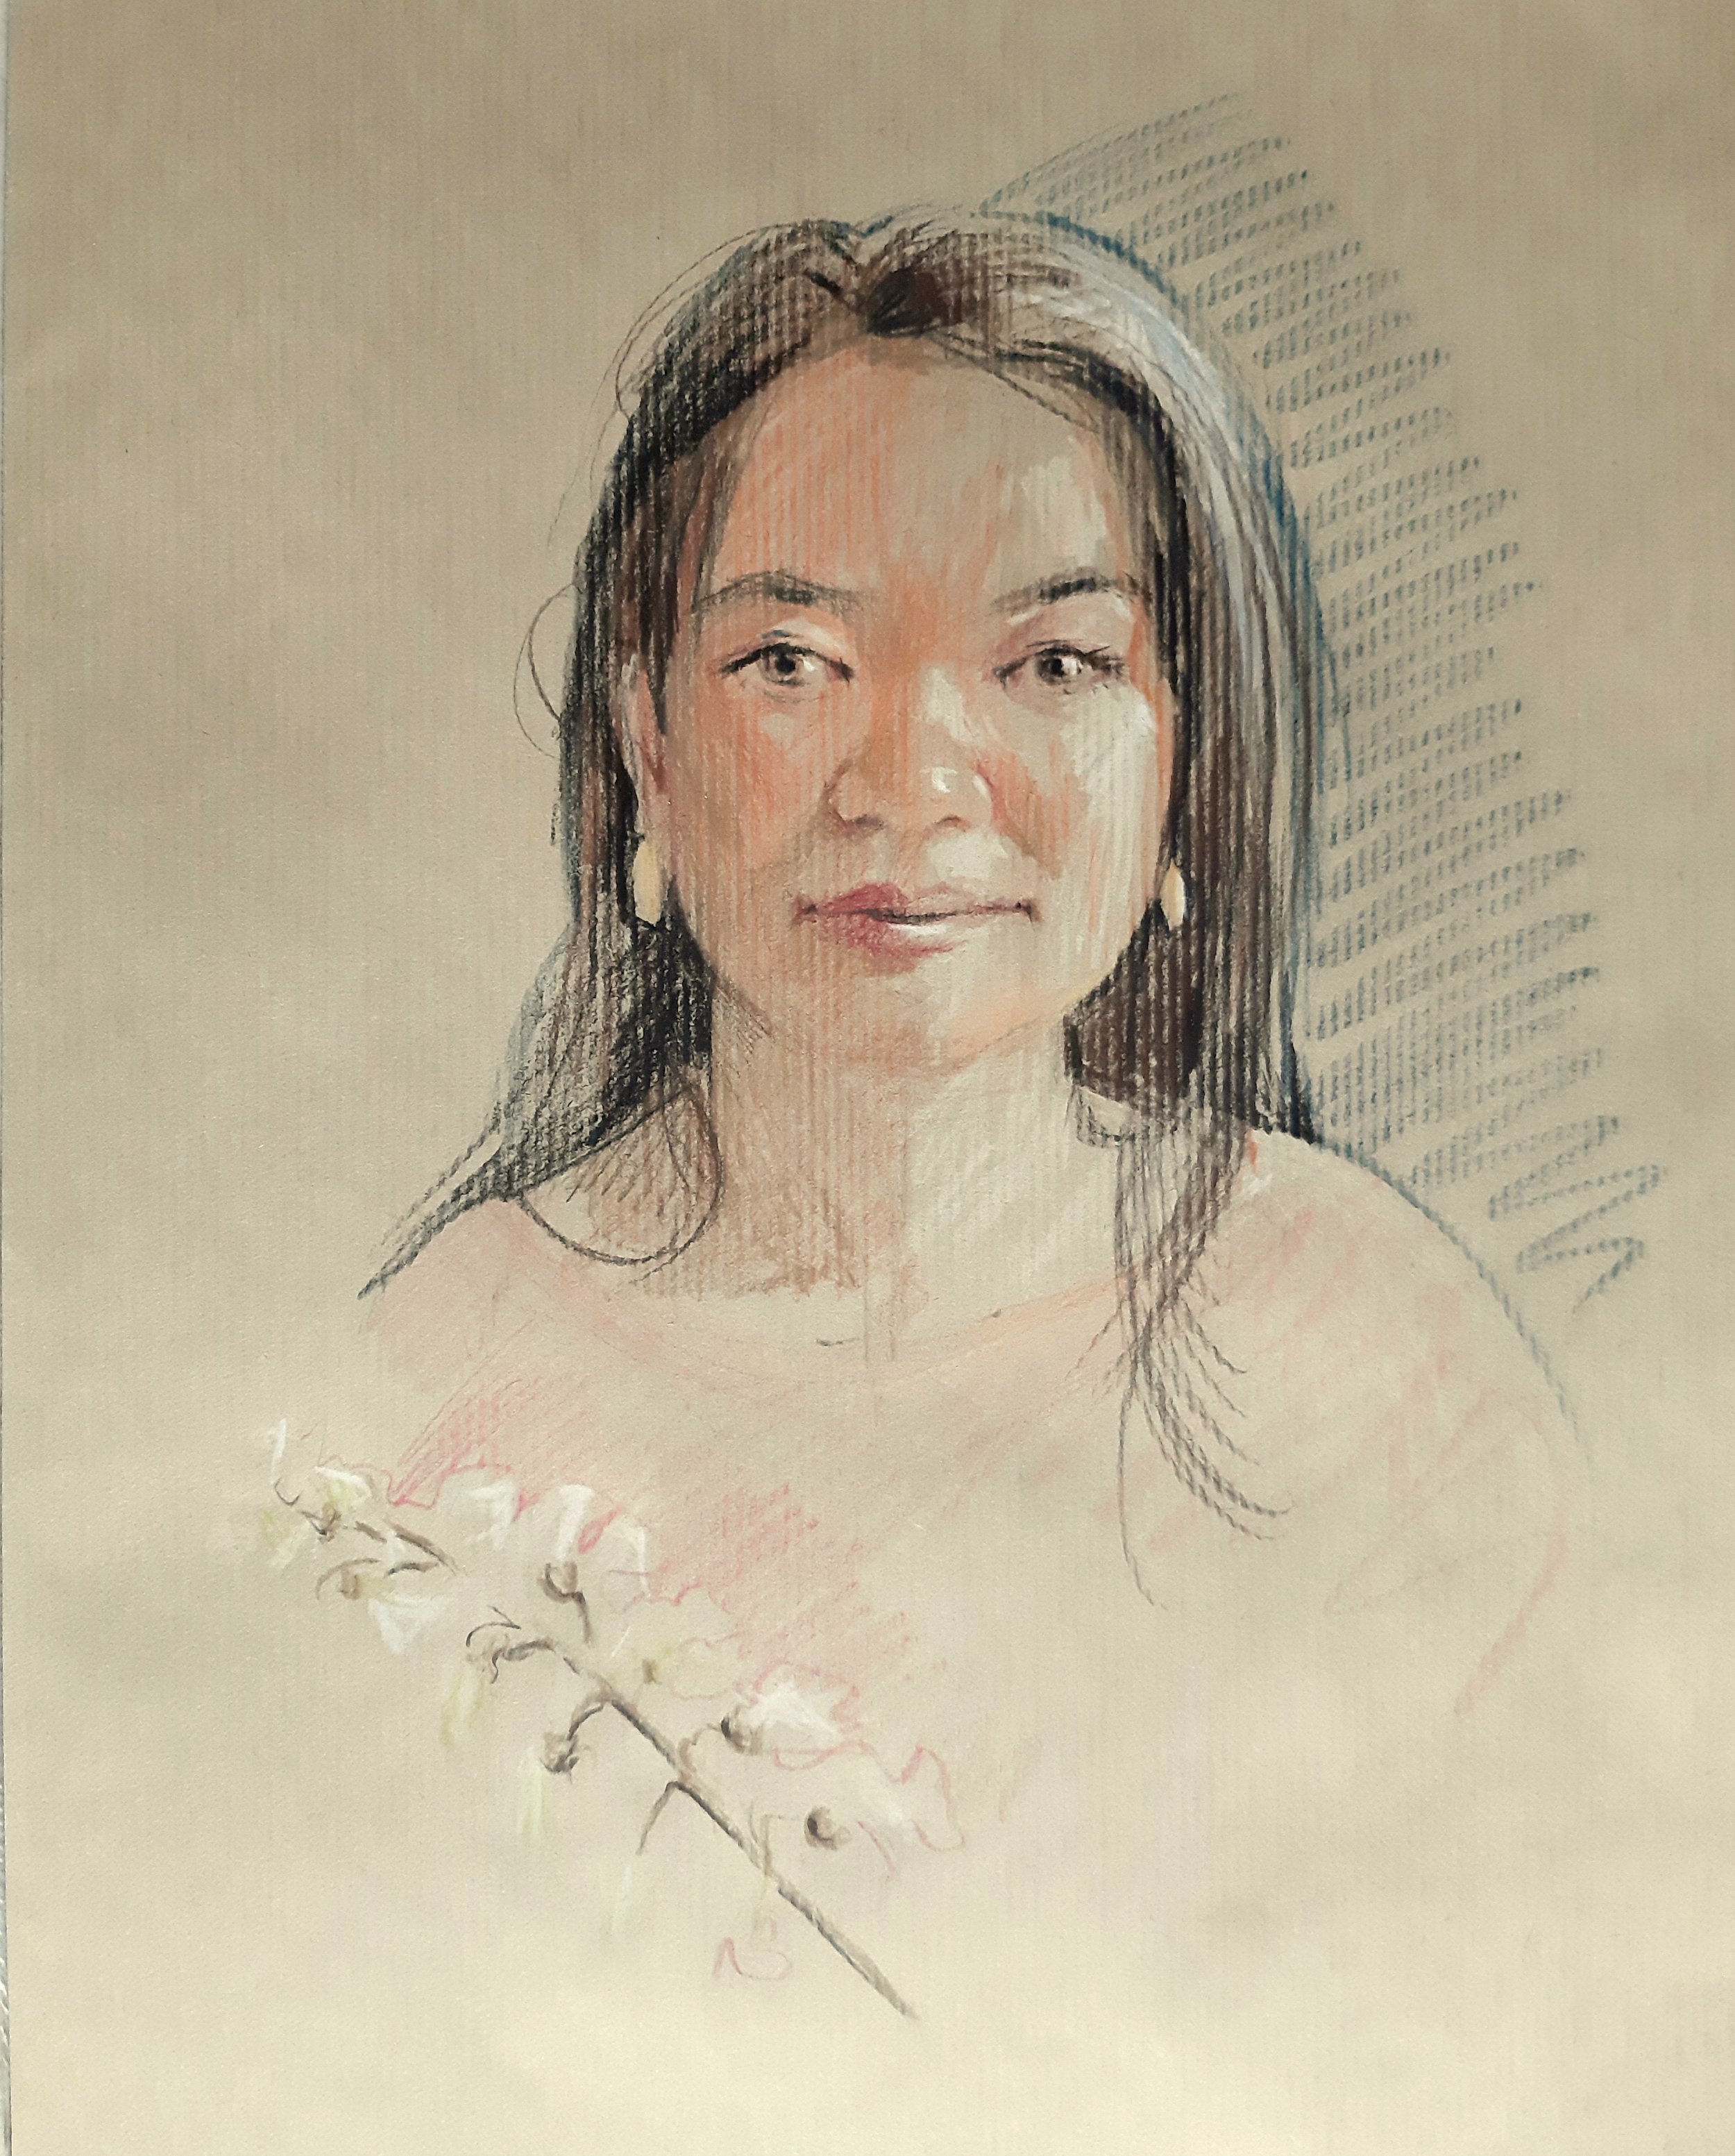
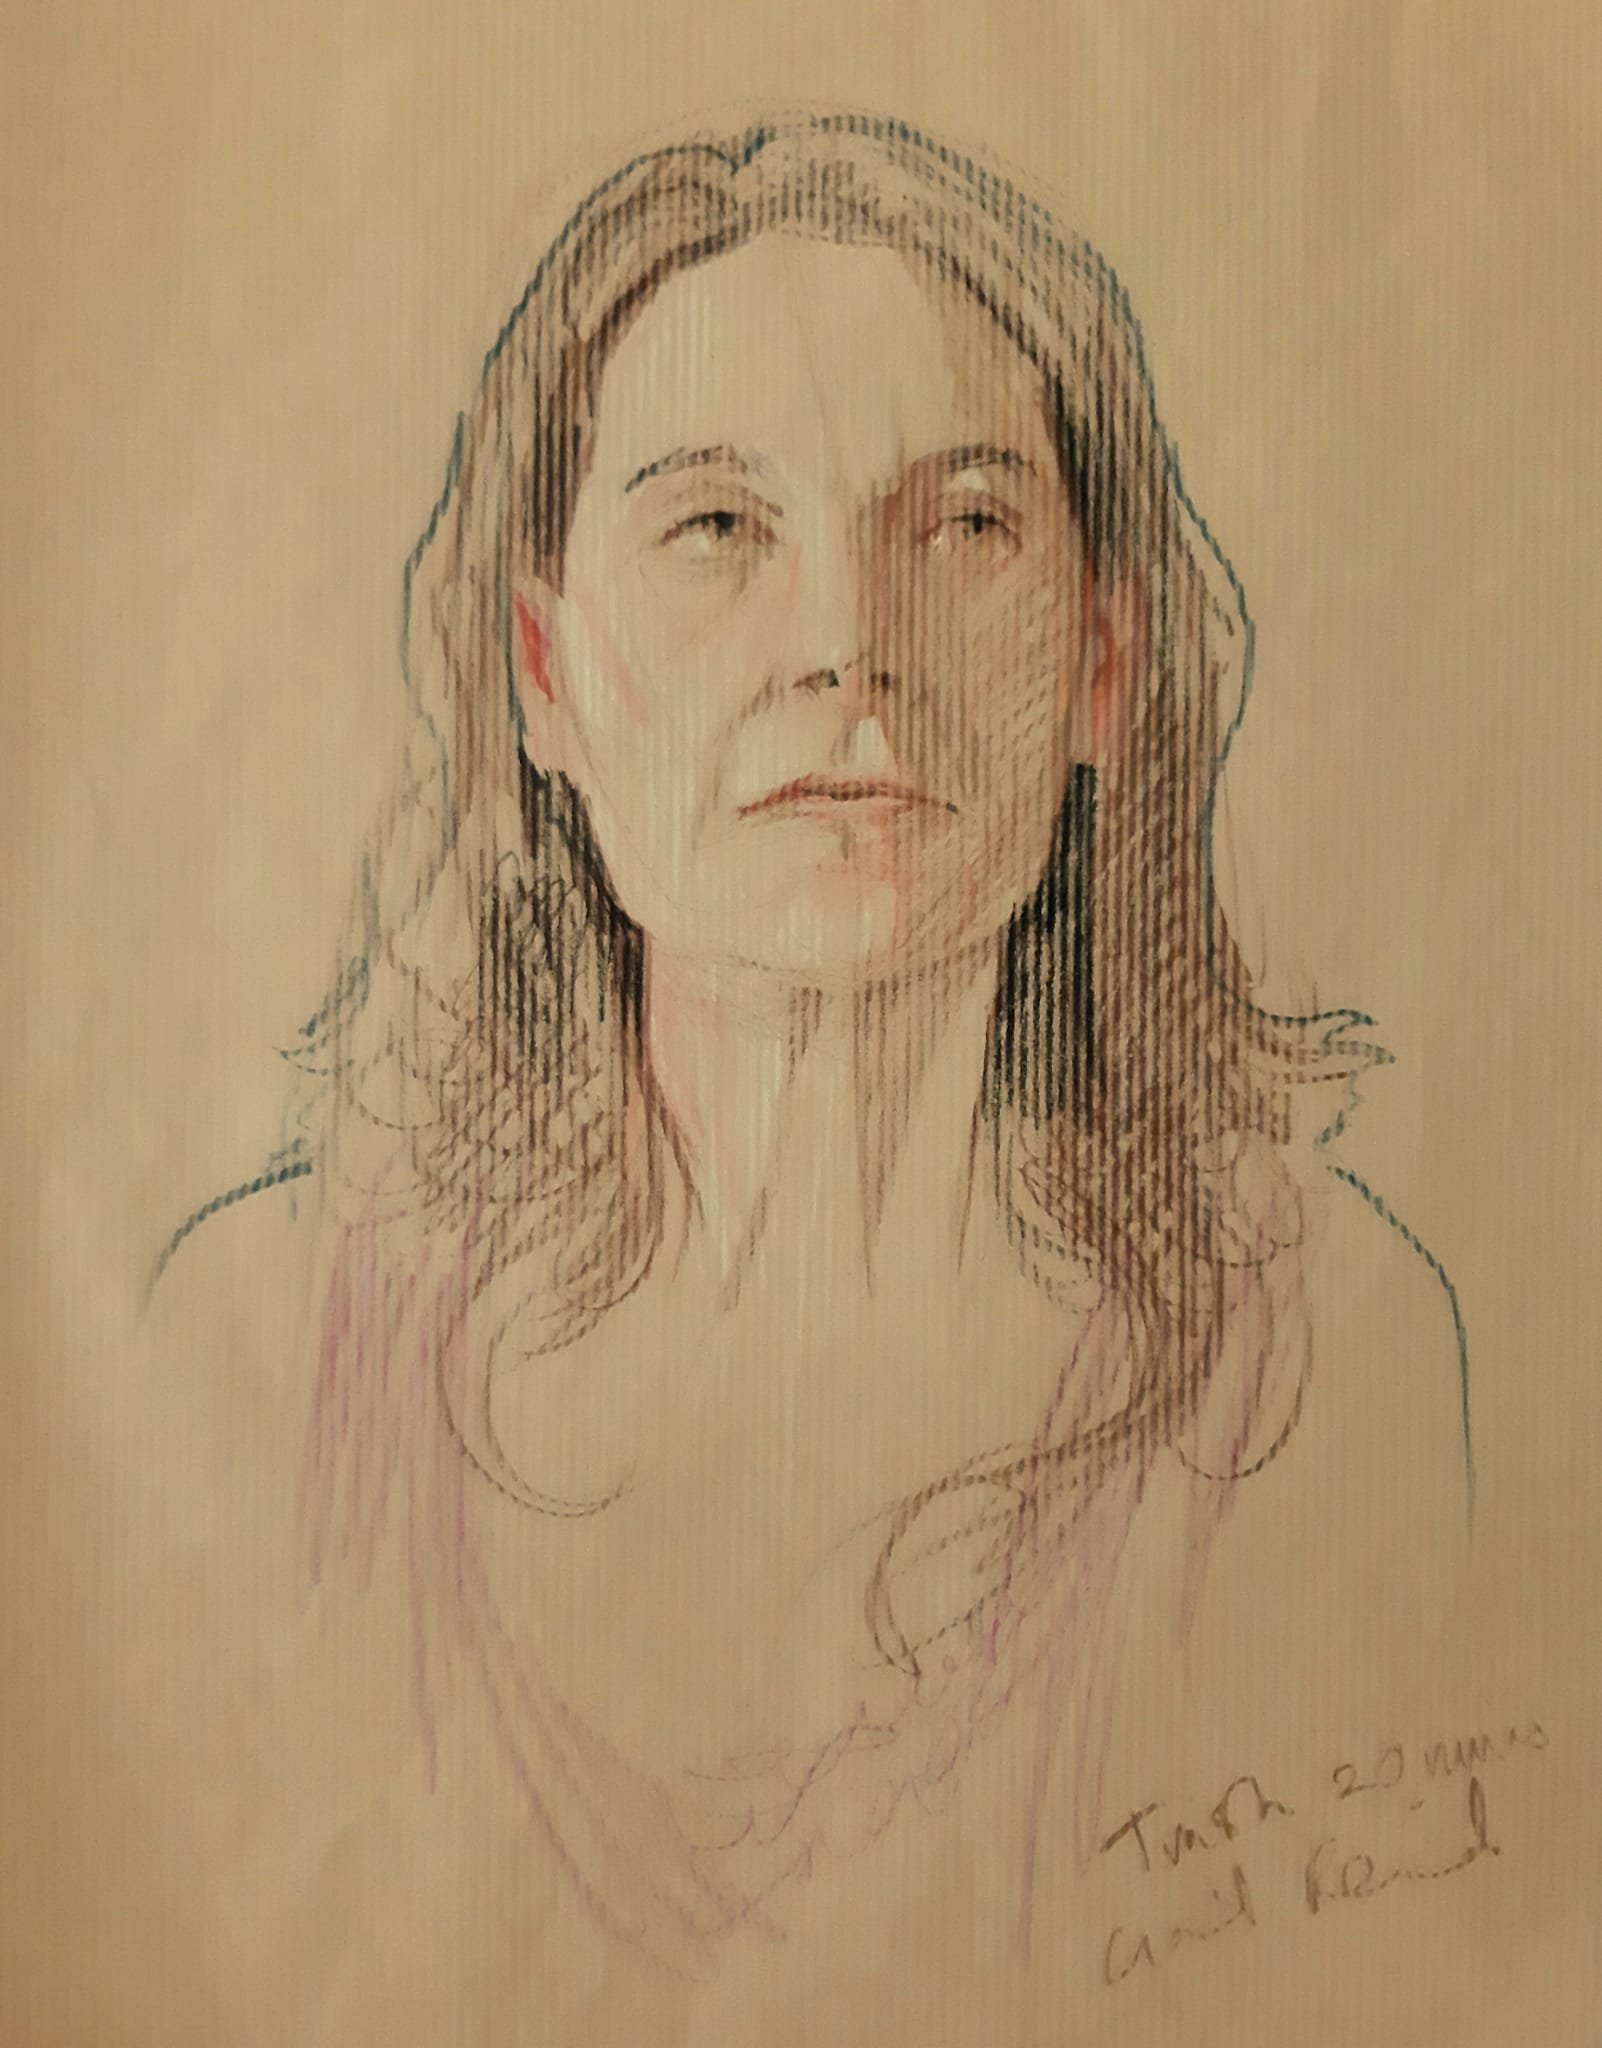
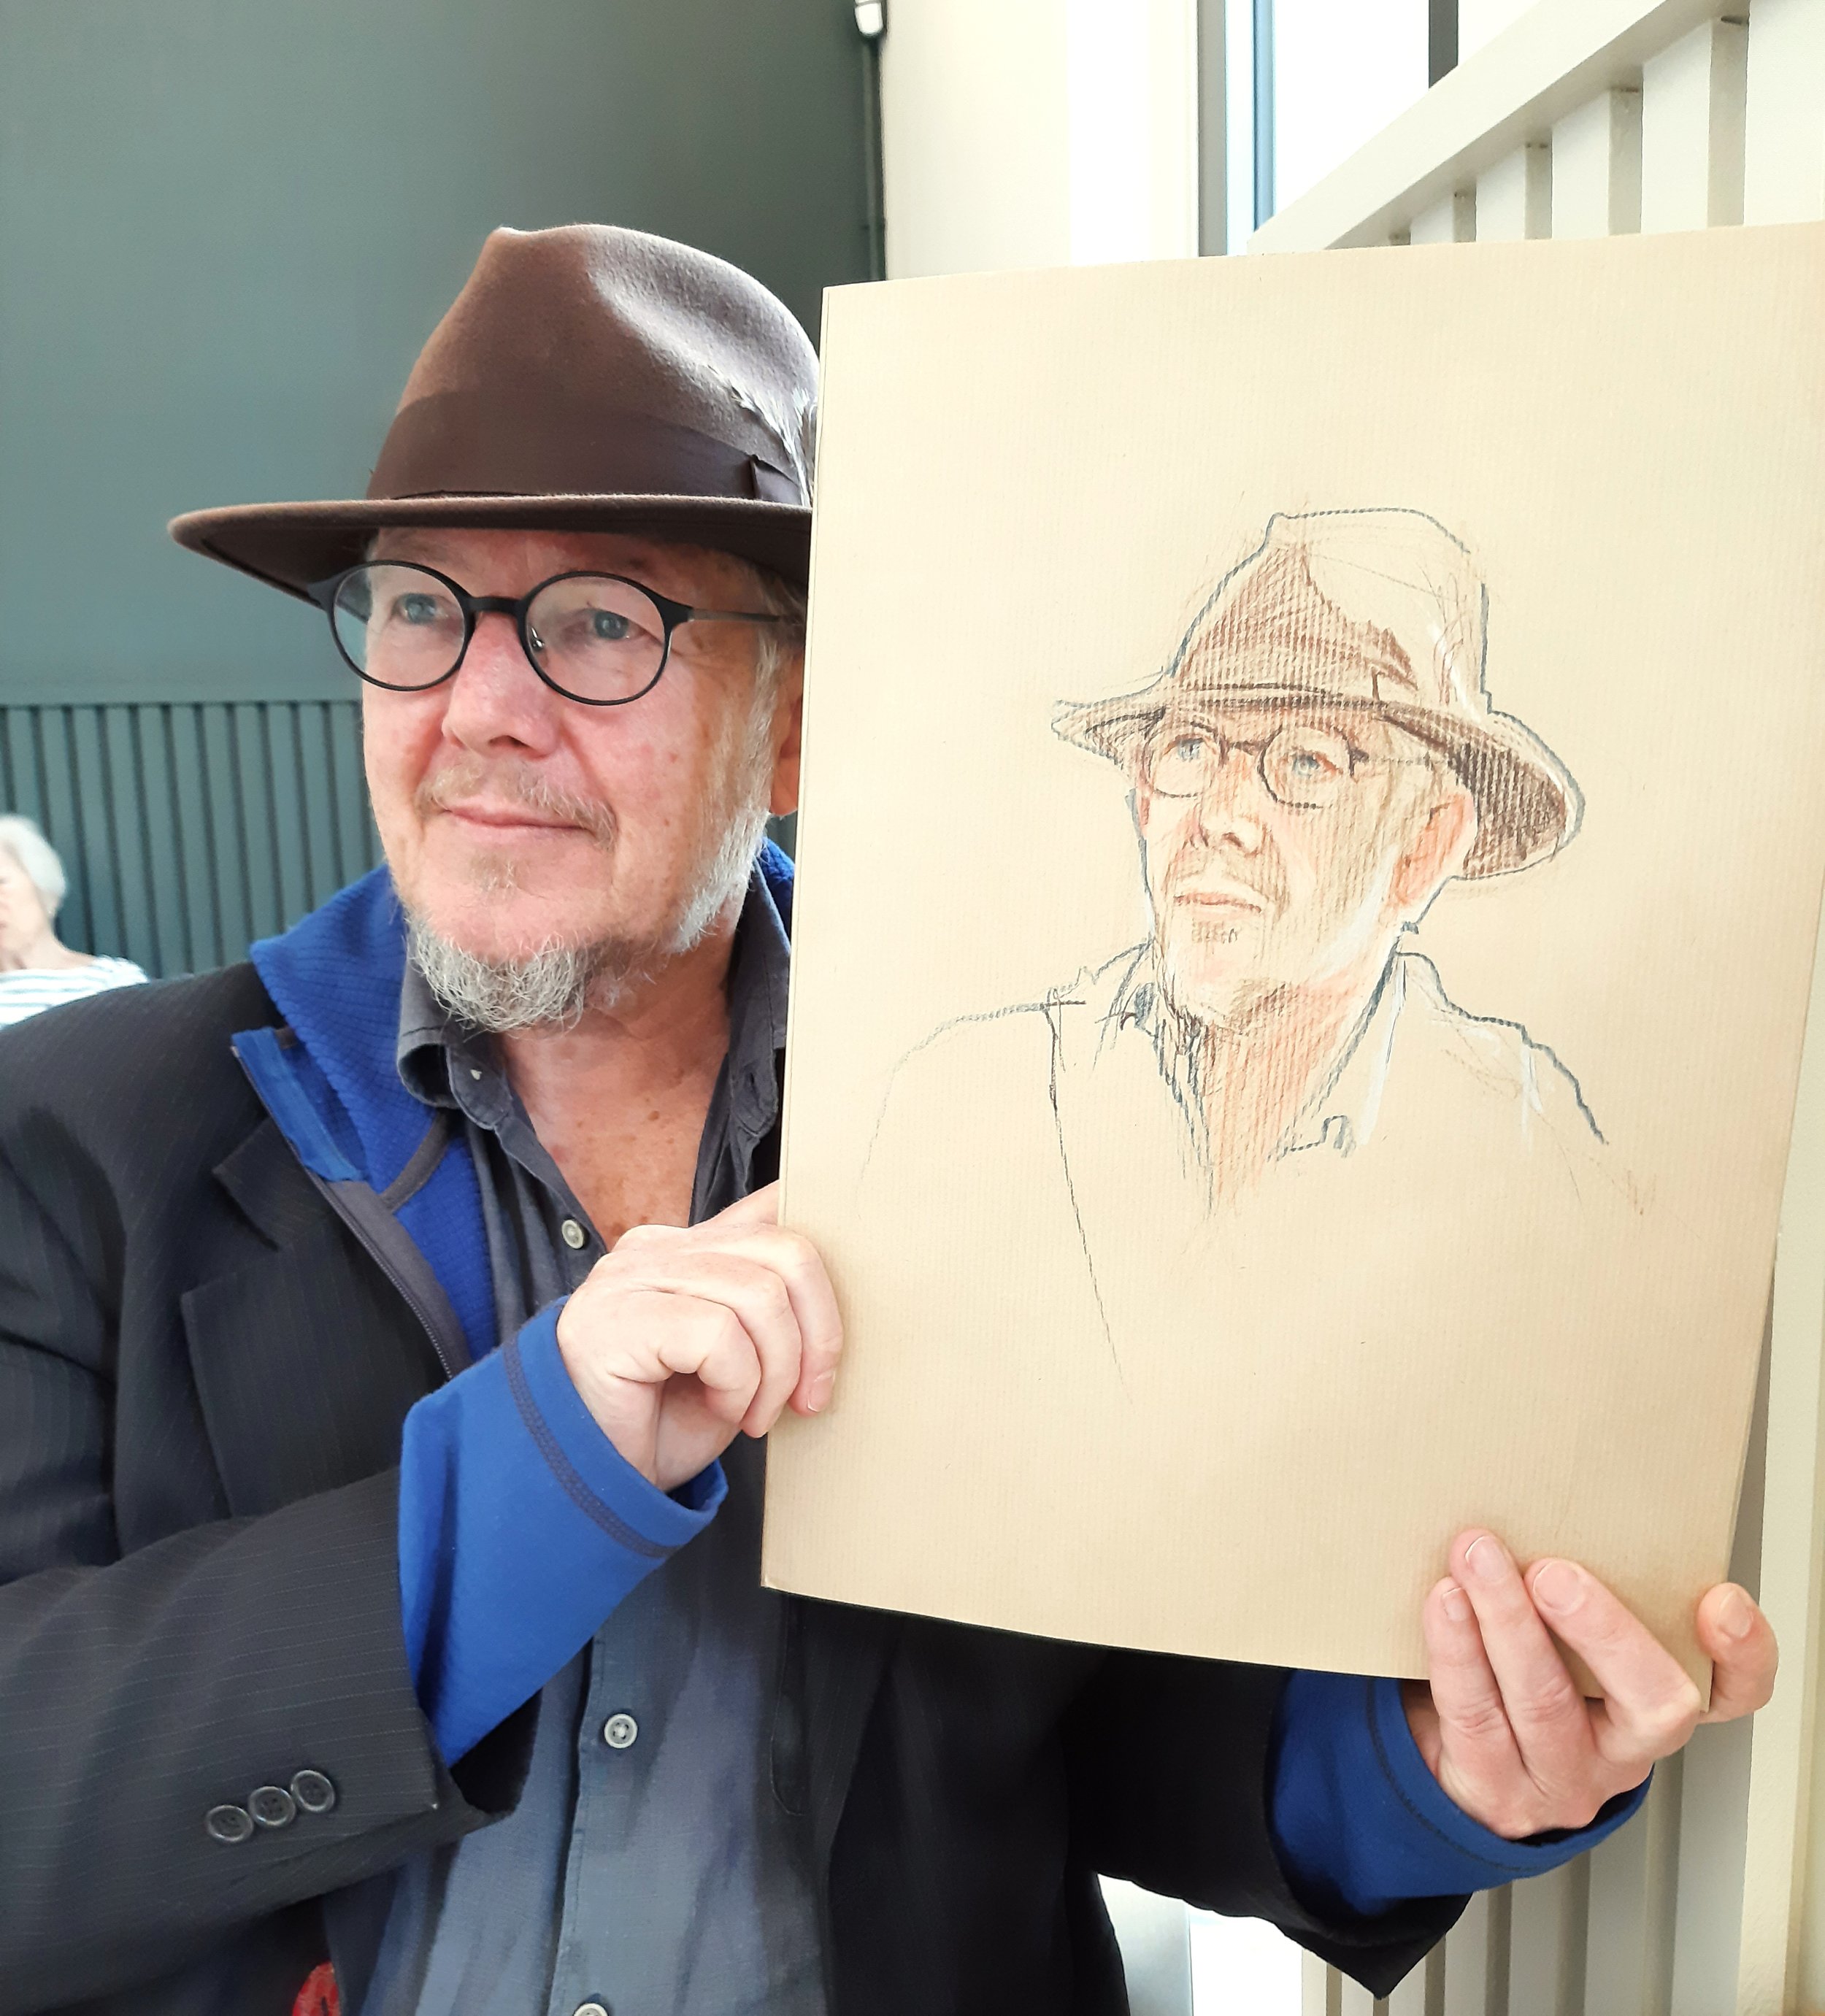
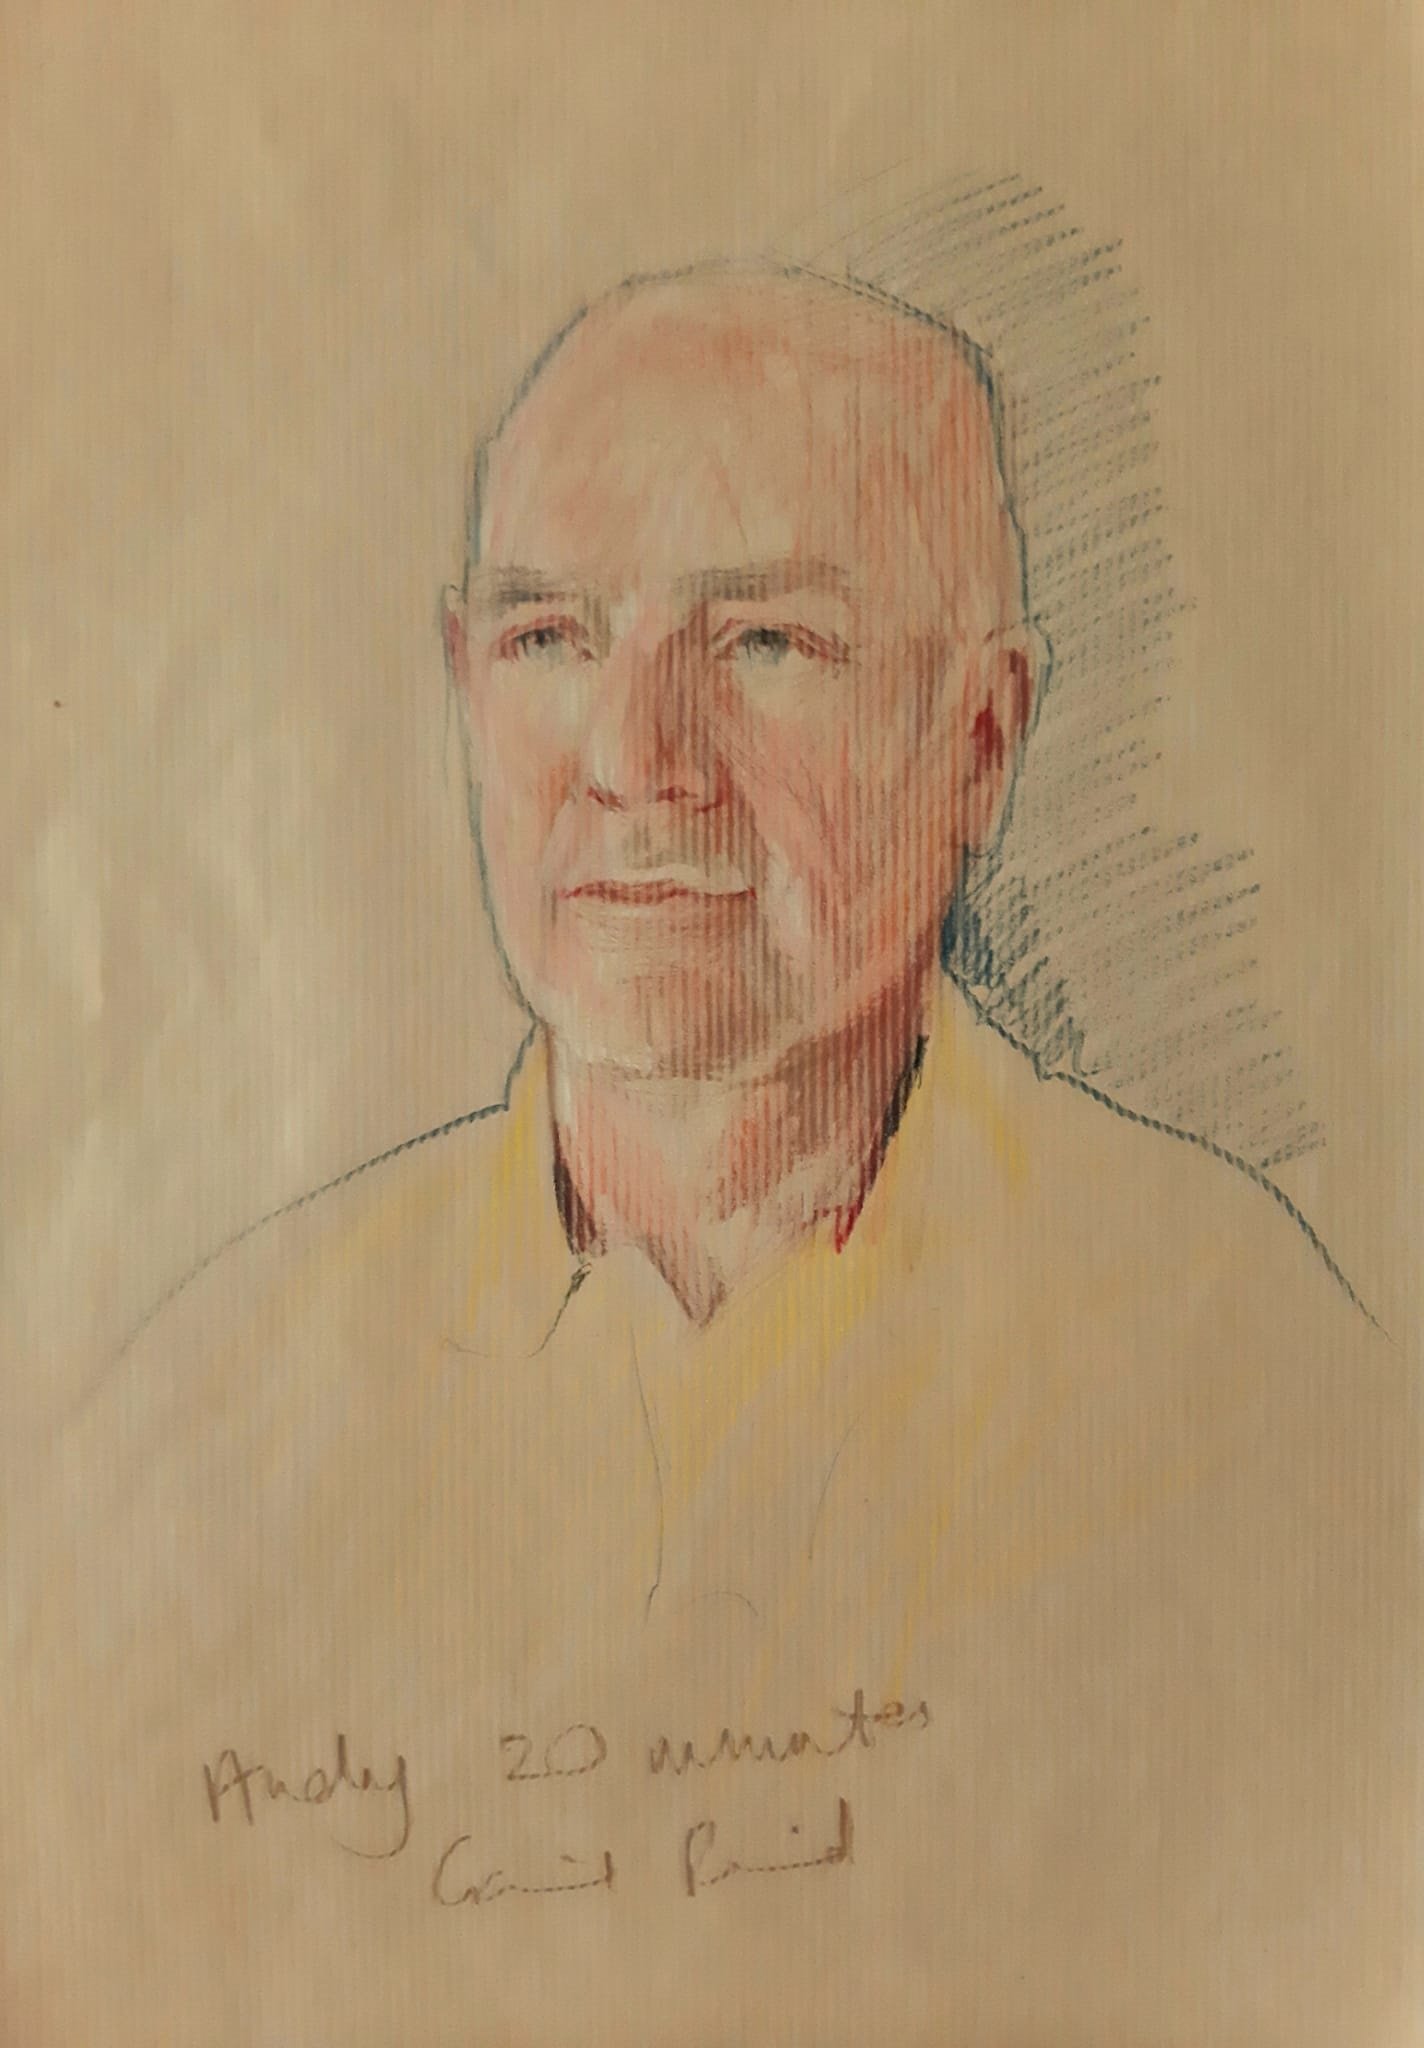
I learned that some people find it really hard to be still (thanks Alan!), and some want to be drawn smiling (thanks Angela ❤). I learned about the challenge of seeing face shape through facial hair and under a hat (thanks Gertie!). Gai wanted to include a flower she’d picked on the way over. Kim found the visual chaos of my studio disturbing, and elected to close her eyes. Trish sat with hair up and hair down, and I realised the need to project a warm personality, even with a resting face. Every person I drew taught me something about how to brief a sitter, how to help them enjoy the experience, how to deal with timers, broken pencils, interruptions, etc… but still the likeness was very inconsistent.


Back to the drawing board
So I gorged videos and blogs on capturing a likeness, gathering different approaches. I felt a connection with the technical teams that support elite sportspeople - looking through the haystack for those tiny gains that might give them a slight advantage, in the hope of adding up to a win.
Tip 5 - The black mirror
I remembered a trick I’d learned on a sight-size course in the Bristol branch of Lara (the now sadly gone London Atelier of Realist Art): the dark mirror. If you’re interested, here are several traditional ways you can use a mirror to get fresh sight of your work (and sitter) during the drawing process. The extra ingredient from Lara was that you could use a turned-off mobile phone/tablet, which (being black and reflective) had the added advantage of reducing distracting detail and contrast. This trick is great for when the drawing looks wrong, but you can’t pin down why. Also, having blocked in the general shapes, it’s a good checkpoint before committing with stronger marks. Some people feel that using photographic methods to support the drawing process is ‘cheating’, but I’ve never met anyone who objects to a mirror, and am never without my beloved mobile device! See Claude Glass for information on the tradition and advantages of using a black mirror.
Tupperware/Anne Summers/Pampered Chef
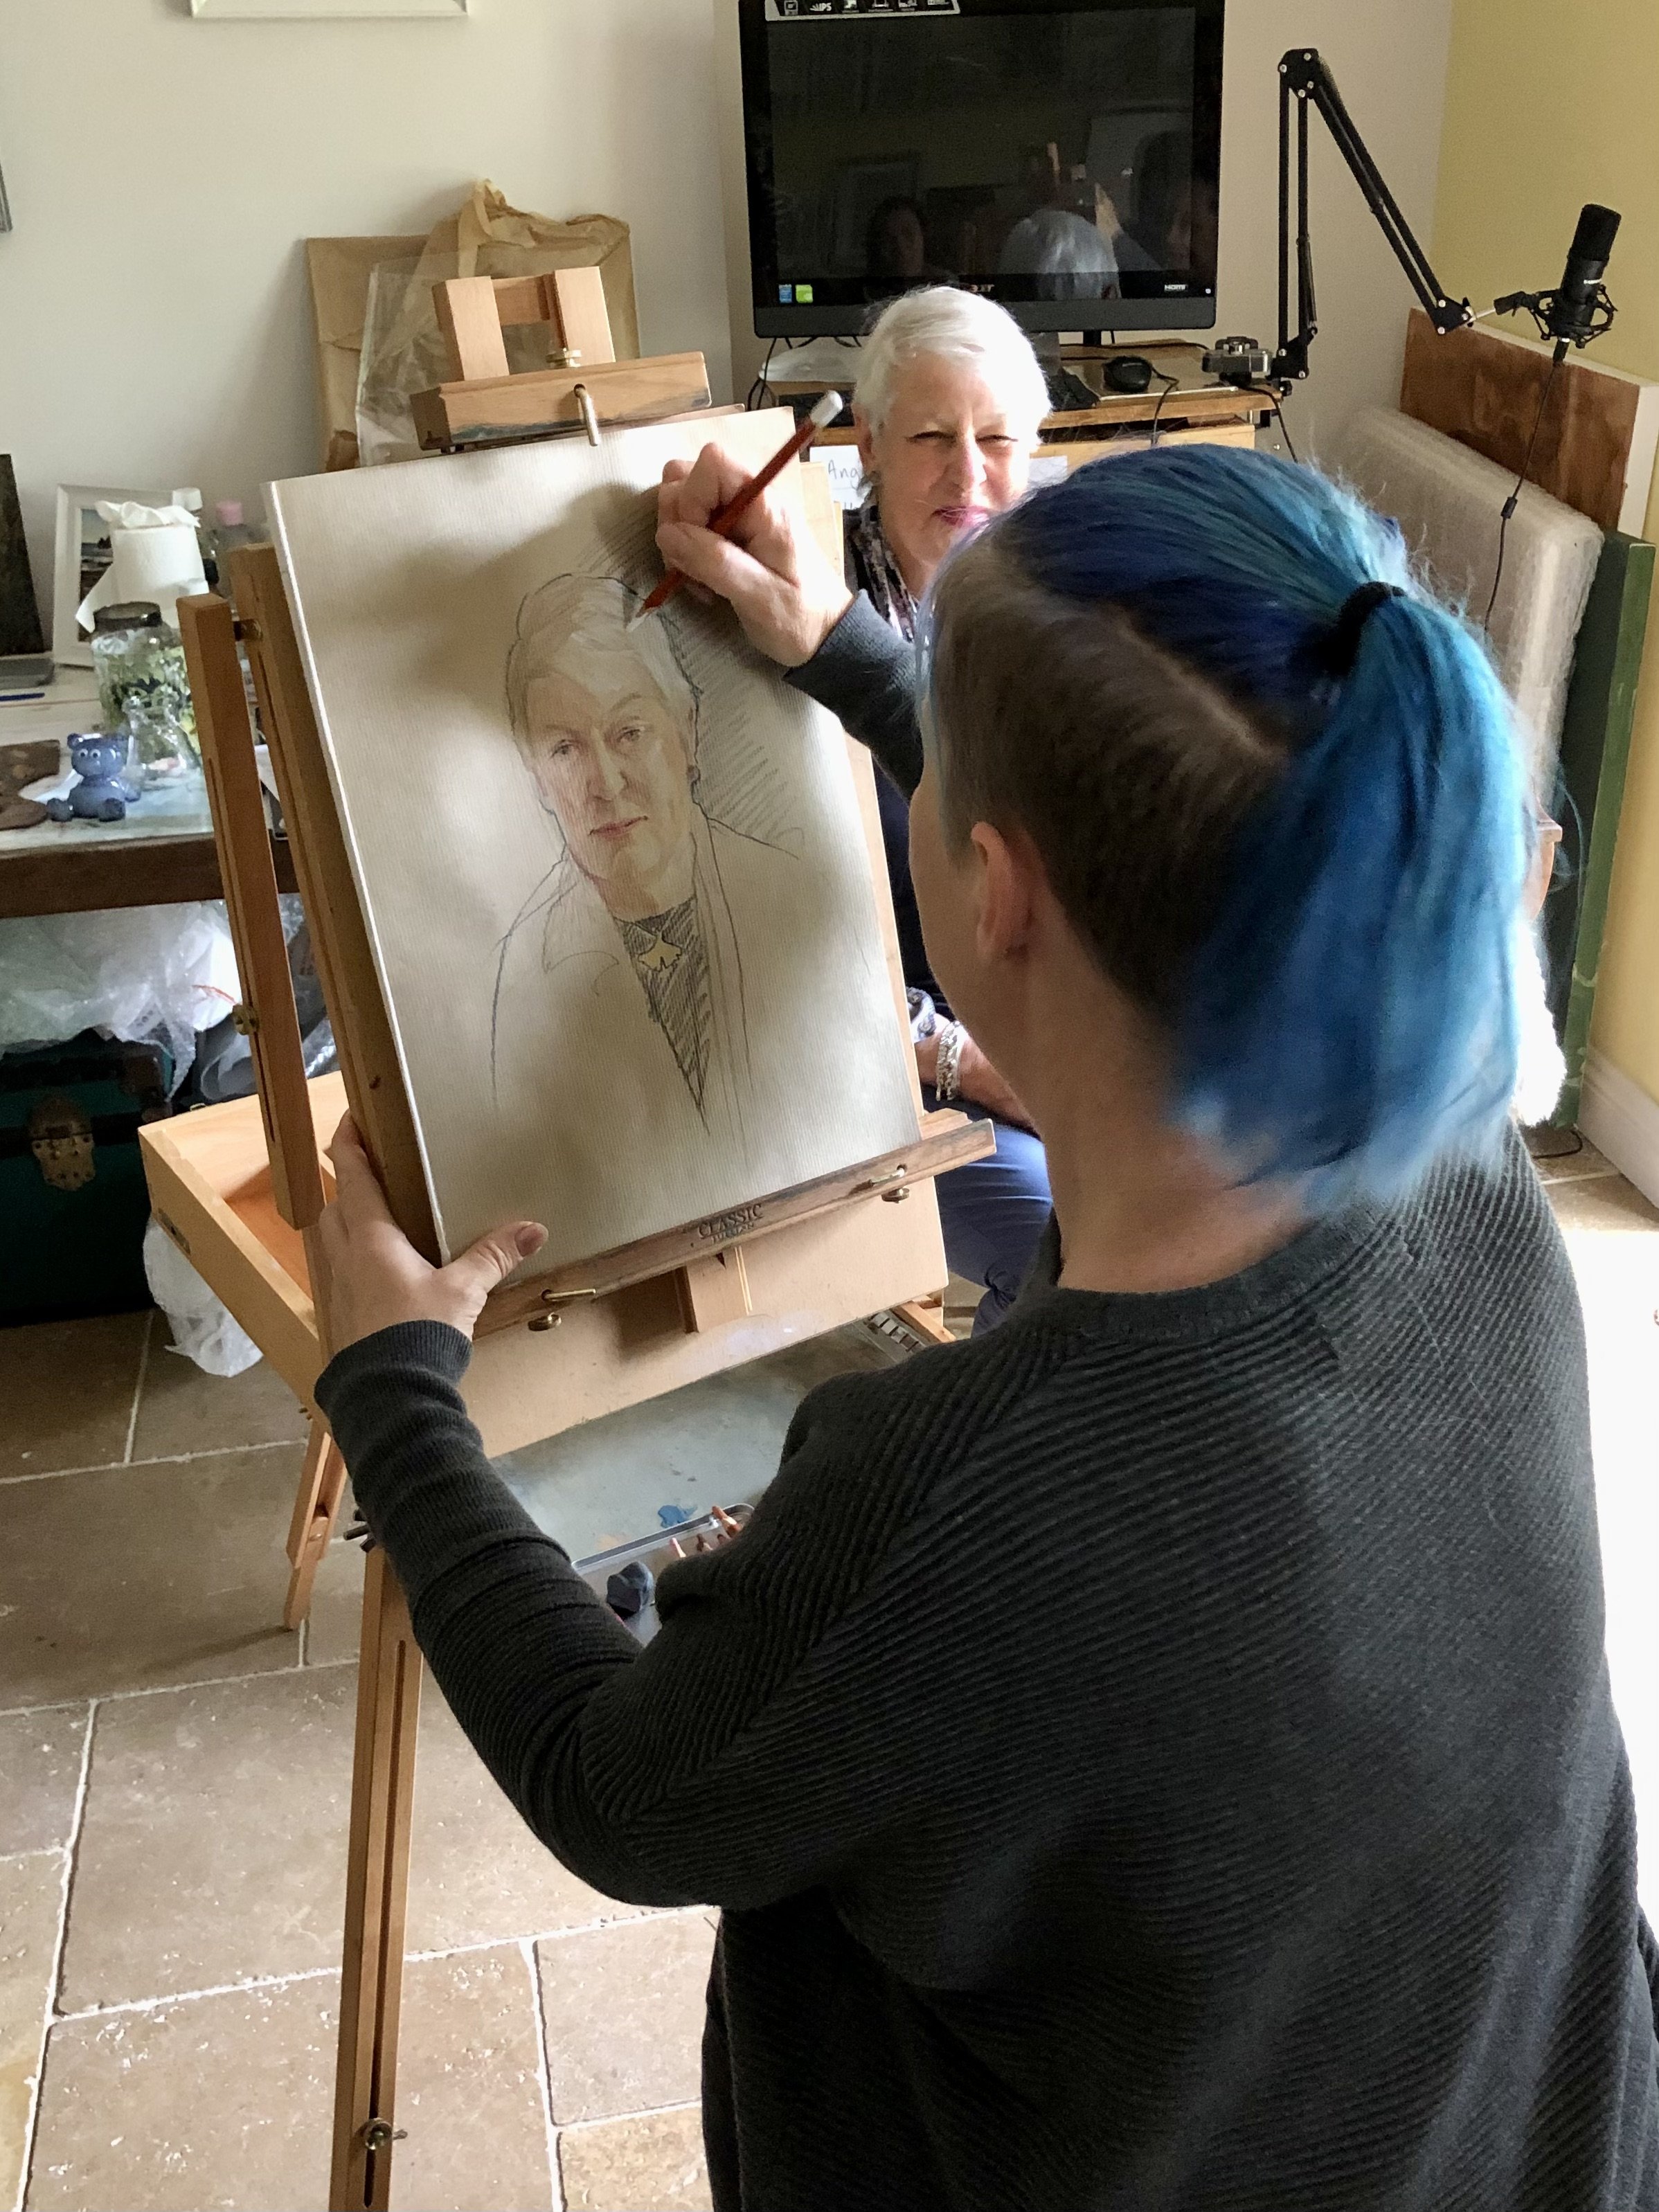
If you’ve been to any of these, you’ll understand the appeal of a ‘party with a purpose’. My wonderful friends Andy and Lorraine (who’d already modelled for me themselves) kindly proposed inviting their friends round for a weekend sesh! It was a great chance to practice on unfamiliar faces.

Using everything I’d learned so far, I brought my best game (fresh new pencils) to the event, and did 5 on the trot. Our hosts very kindly facilitated the portraitathon, with a steady stream of refreshments, in their “Gail Reid Gallery” - they have built up quite a collection of my work over the years, fuelling my self-belief. If you’ve ever bought original art direct, you will have helped an artists in this way too.
Tip 6 - Get your ducks in a row
Confidence and doubt are states I experience in parallel throughout the drawing process, maybe that’s worth another blog…? But having creature comforts so thoughtfully catered to taught me that trivial discomforts (such as we usually just shrug off) are all needles in the haystack. Whether it’s slightly needing the loo, having your easel at the wrong angle, blunt pencils, poor lighting… all workroundable, but the more you can flush out, the better you can focus!

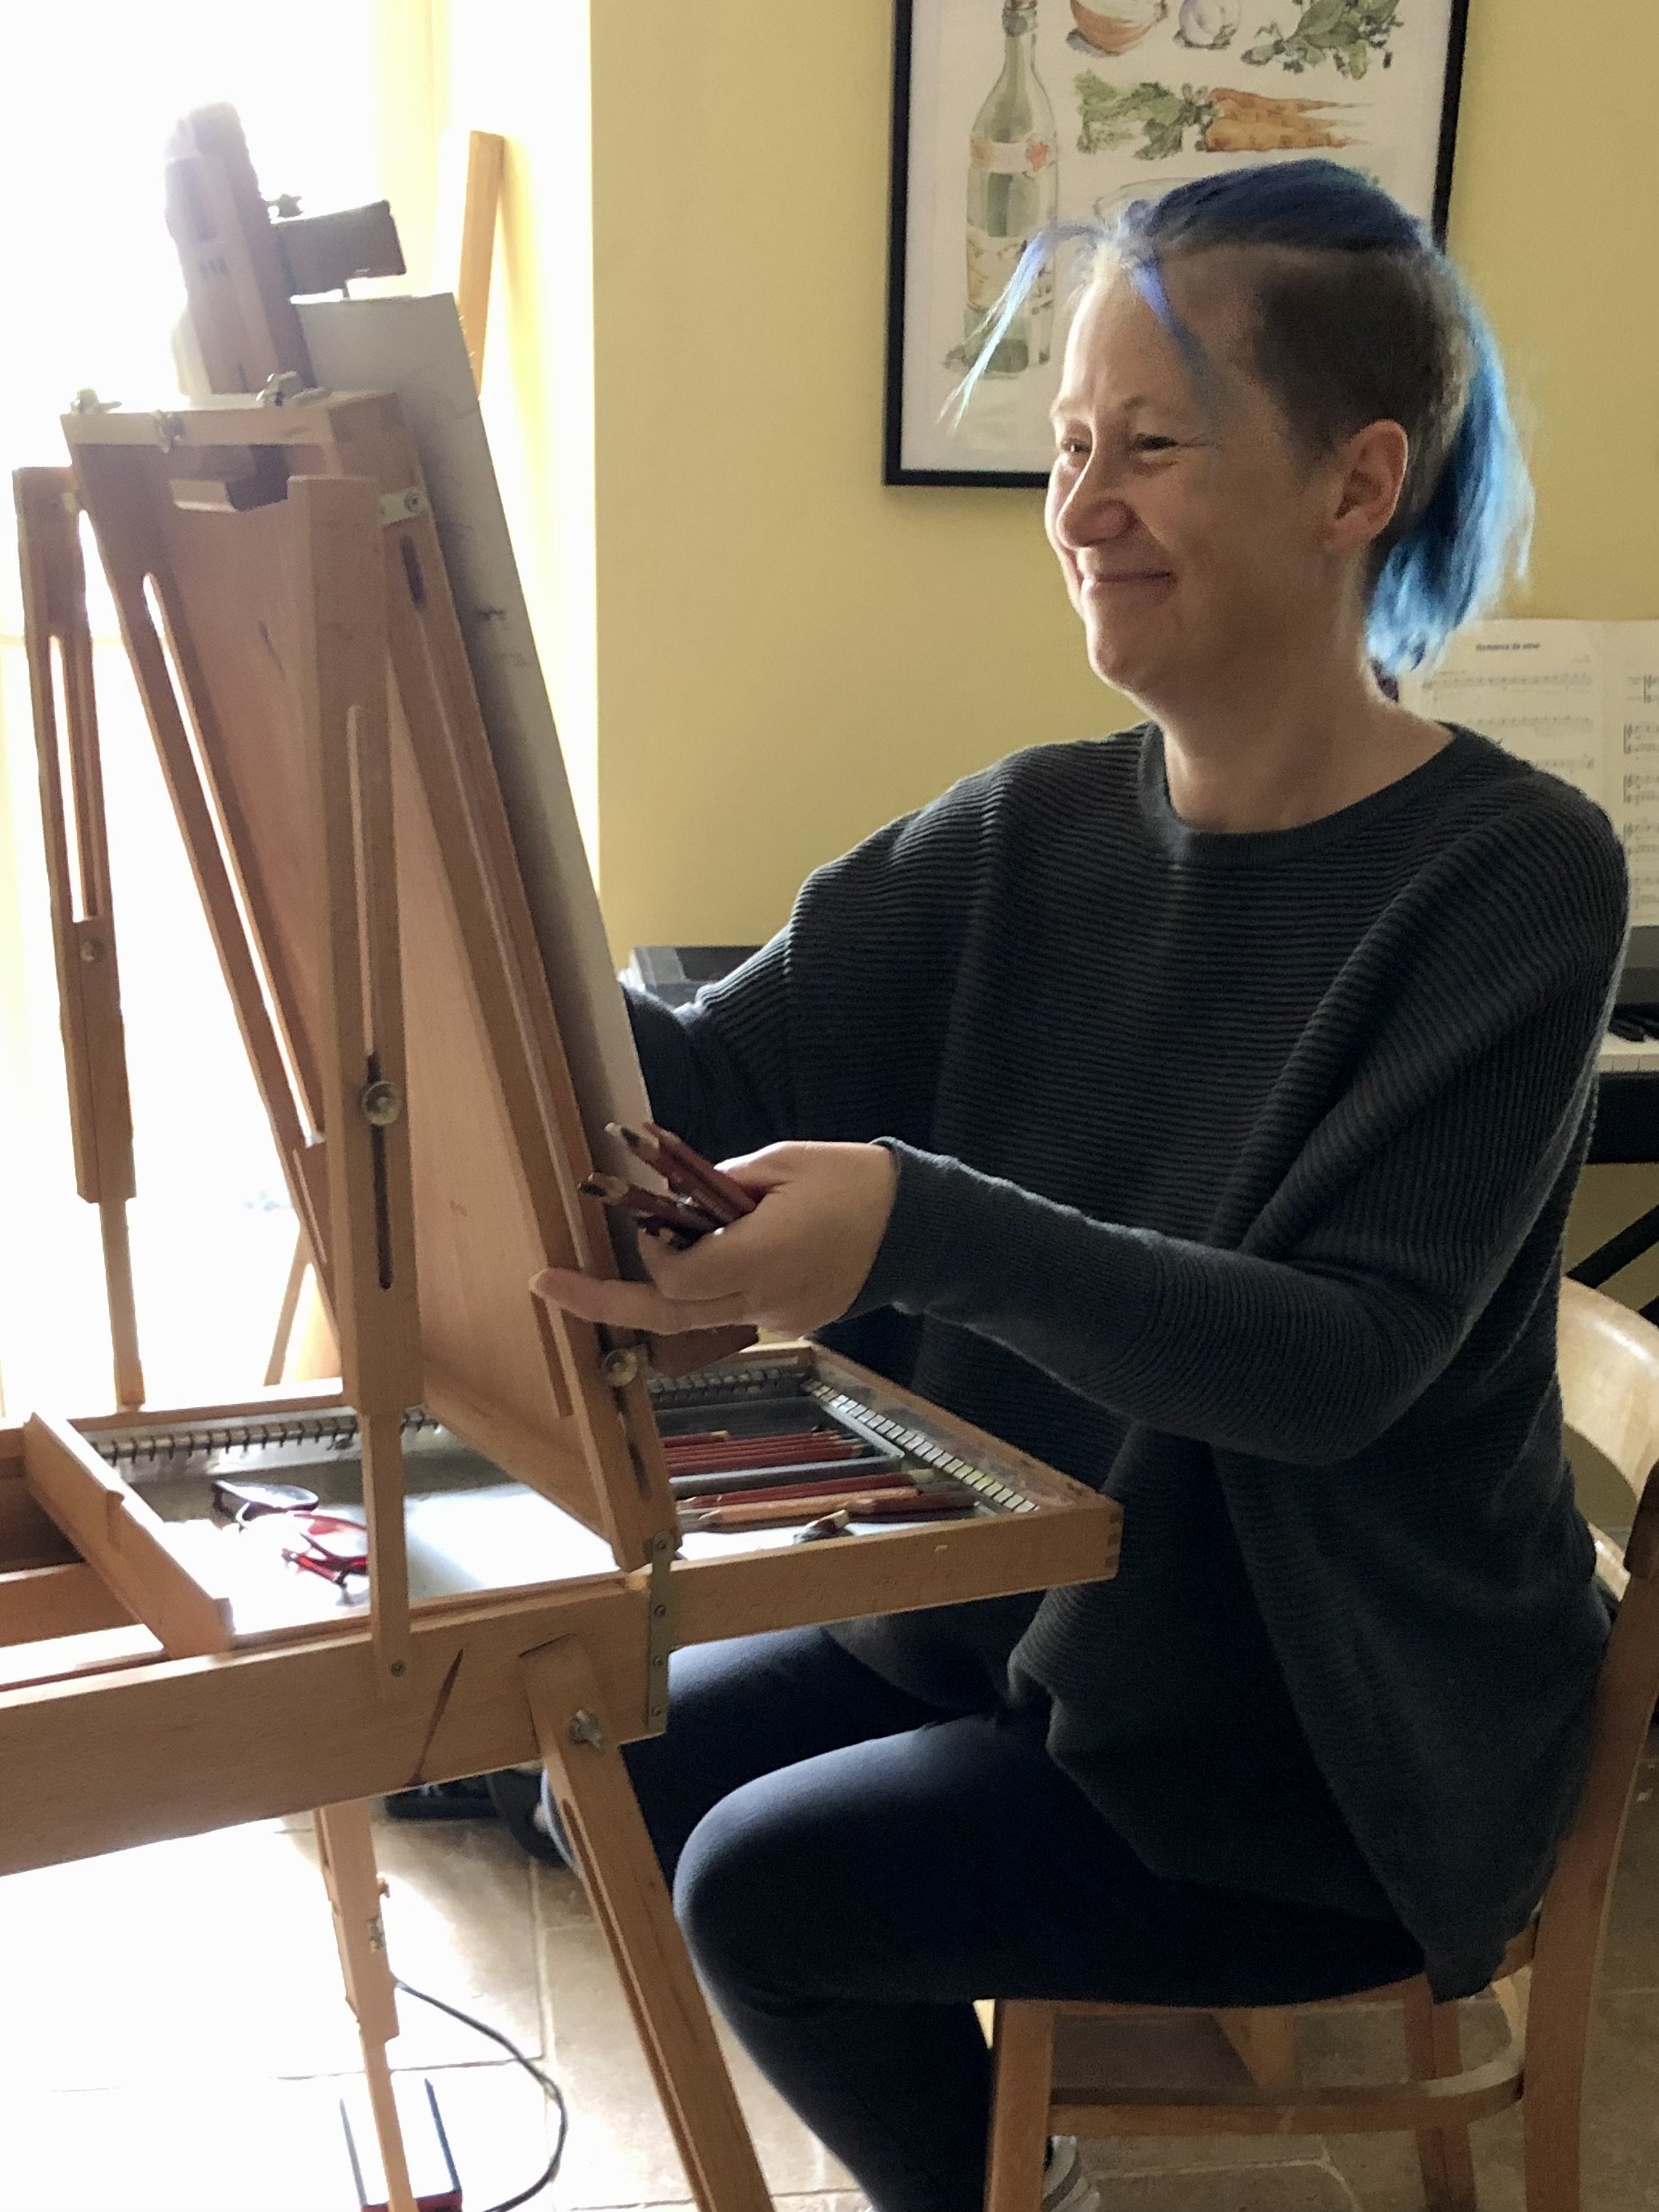
Phone (for the timer) and biscuits to my left!
I managed to produce zero howlers (result), and noticed the average likeness had crept up. Even the ones that weren’t ‘spot on’, felt acceptable given the obvious time constraint. Note the ‘gallery’ behind the sitters!


The last post
As the event date accelerated towards me, I was tempted to quit while I was ahead but a little voice told me to have one last practice. But who?! I’d pretty much burned through all my available local friends and family… social media came to the rescue again - I posted on my private facebook profile, looking for friends as models to fill 5 consecutive timeslots the following day. Seems this is really some peoples’ idea of fun, and within a few minutes, a fresh batch of wonderful sitters were all booked in.
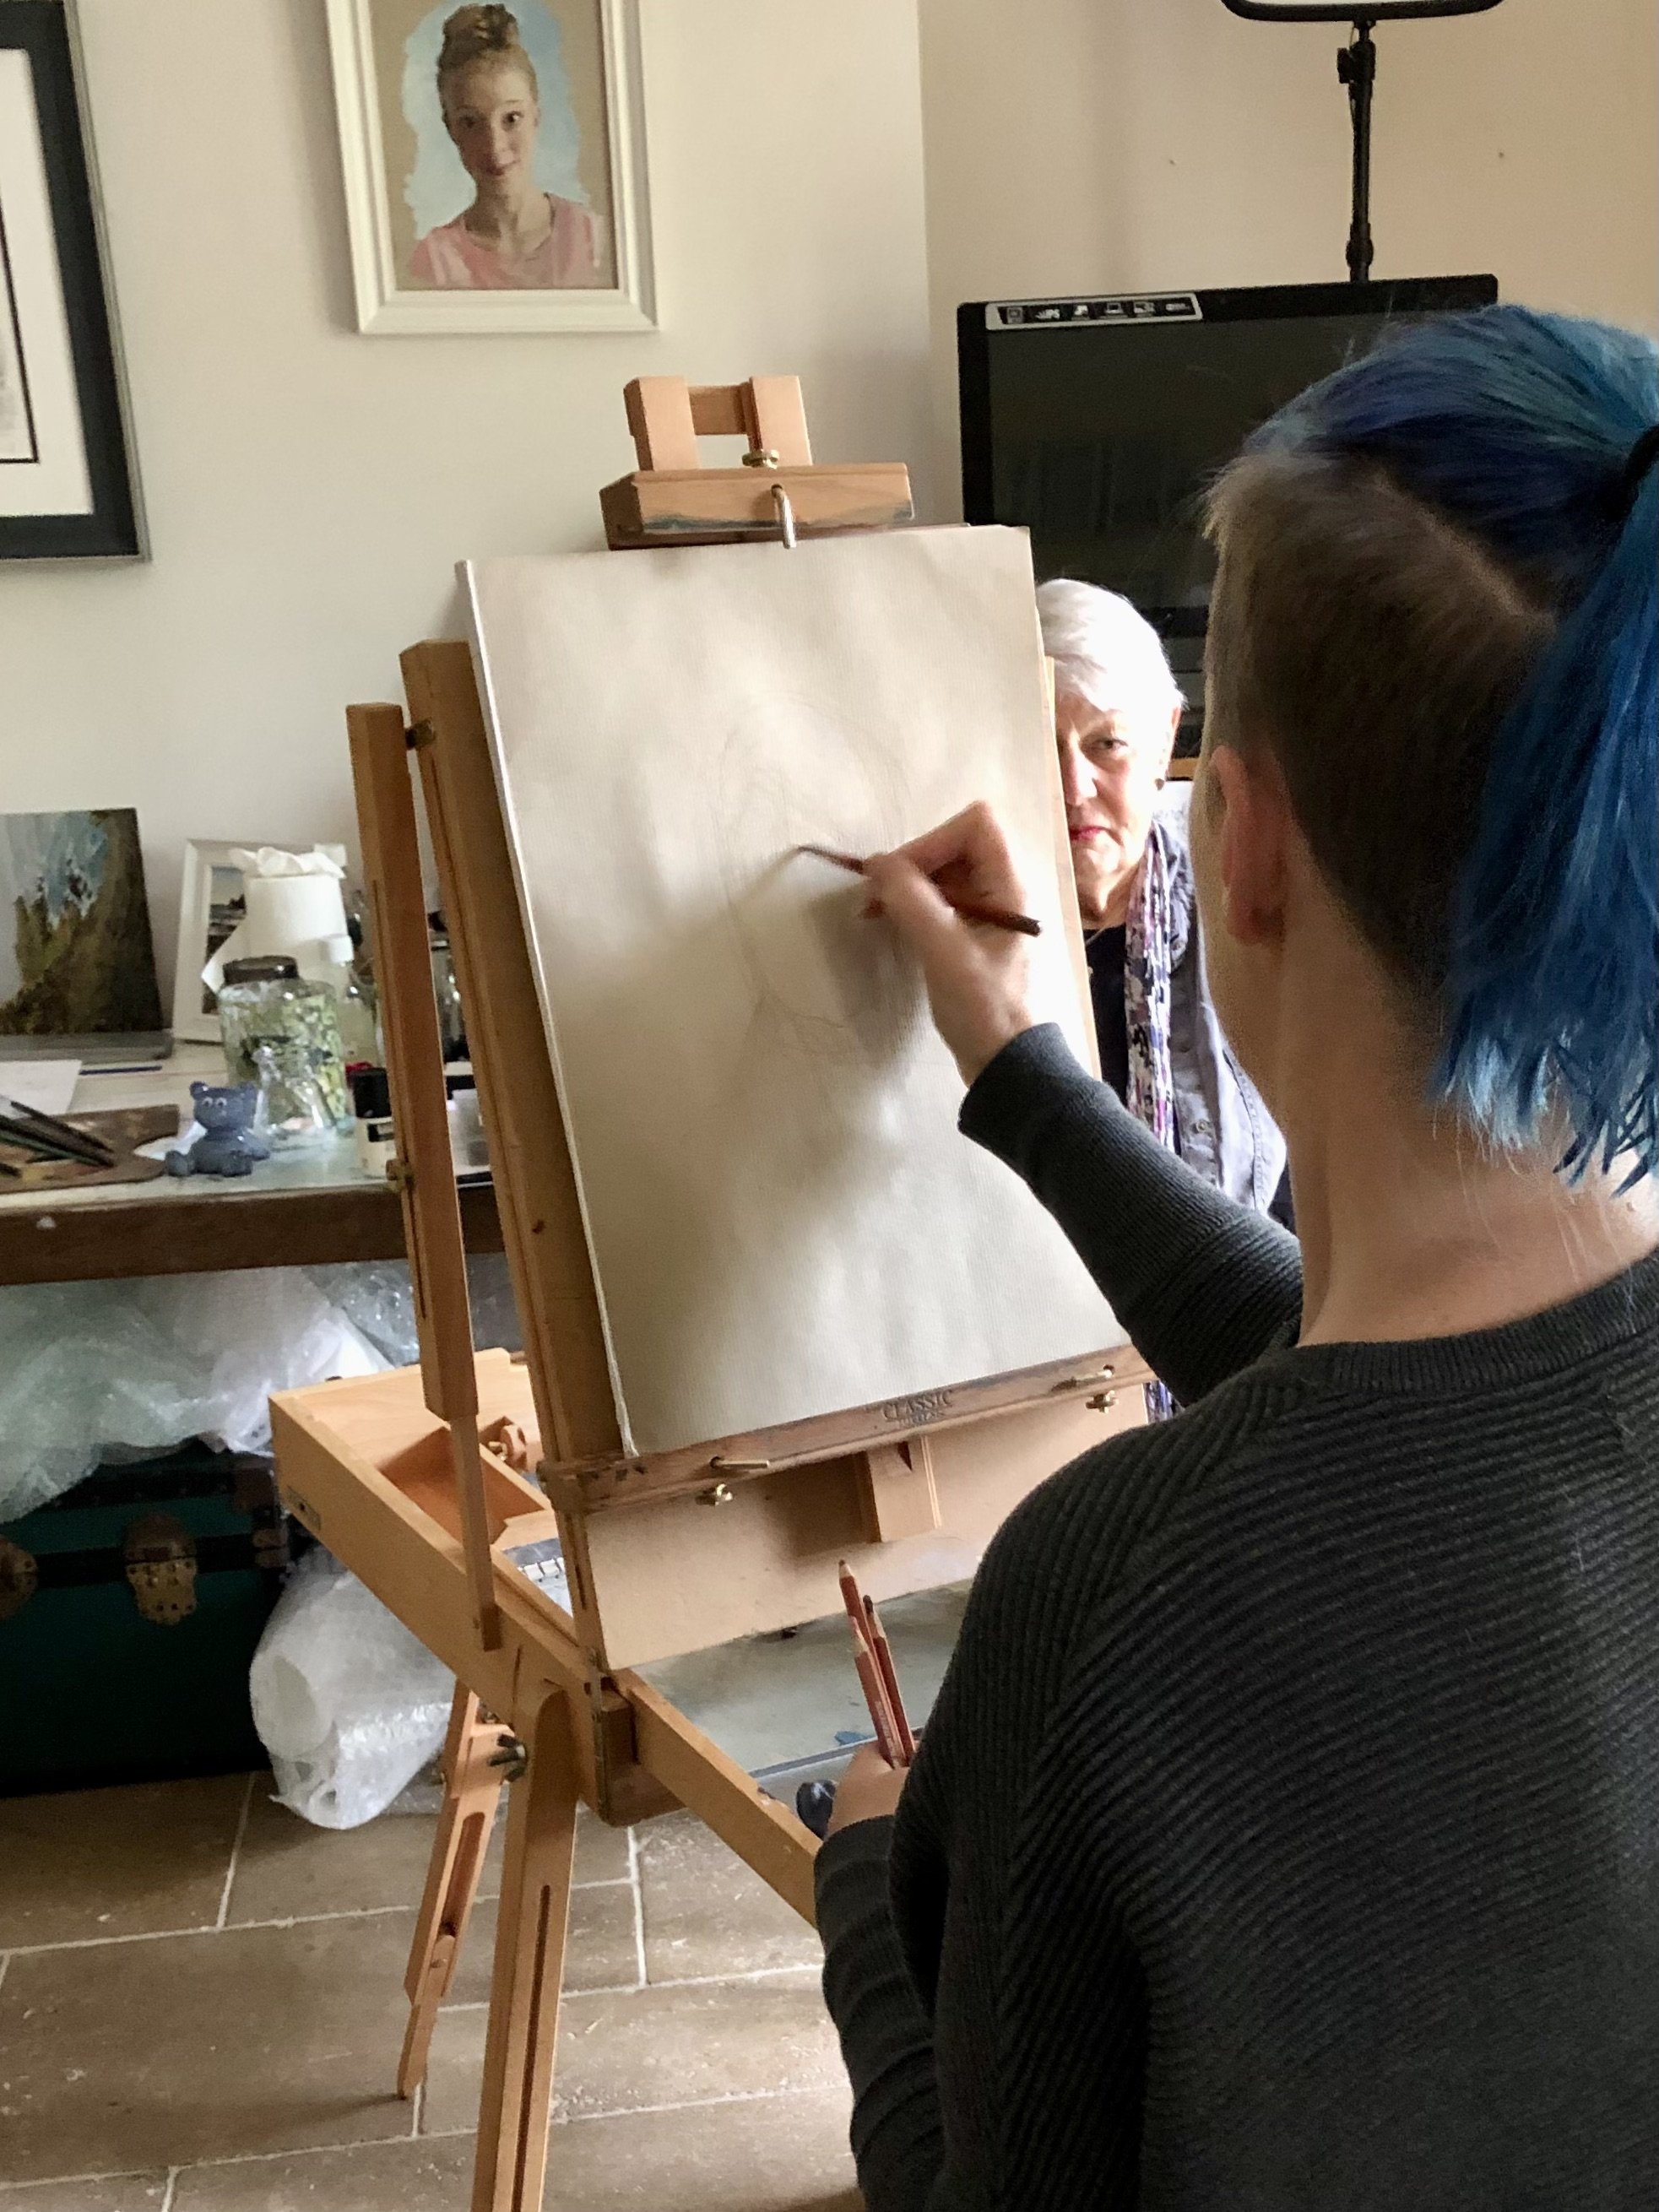
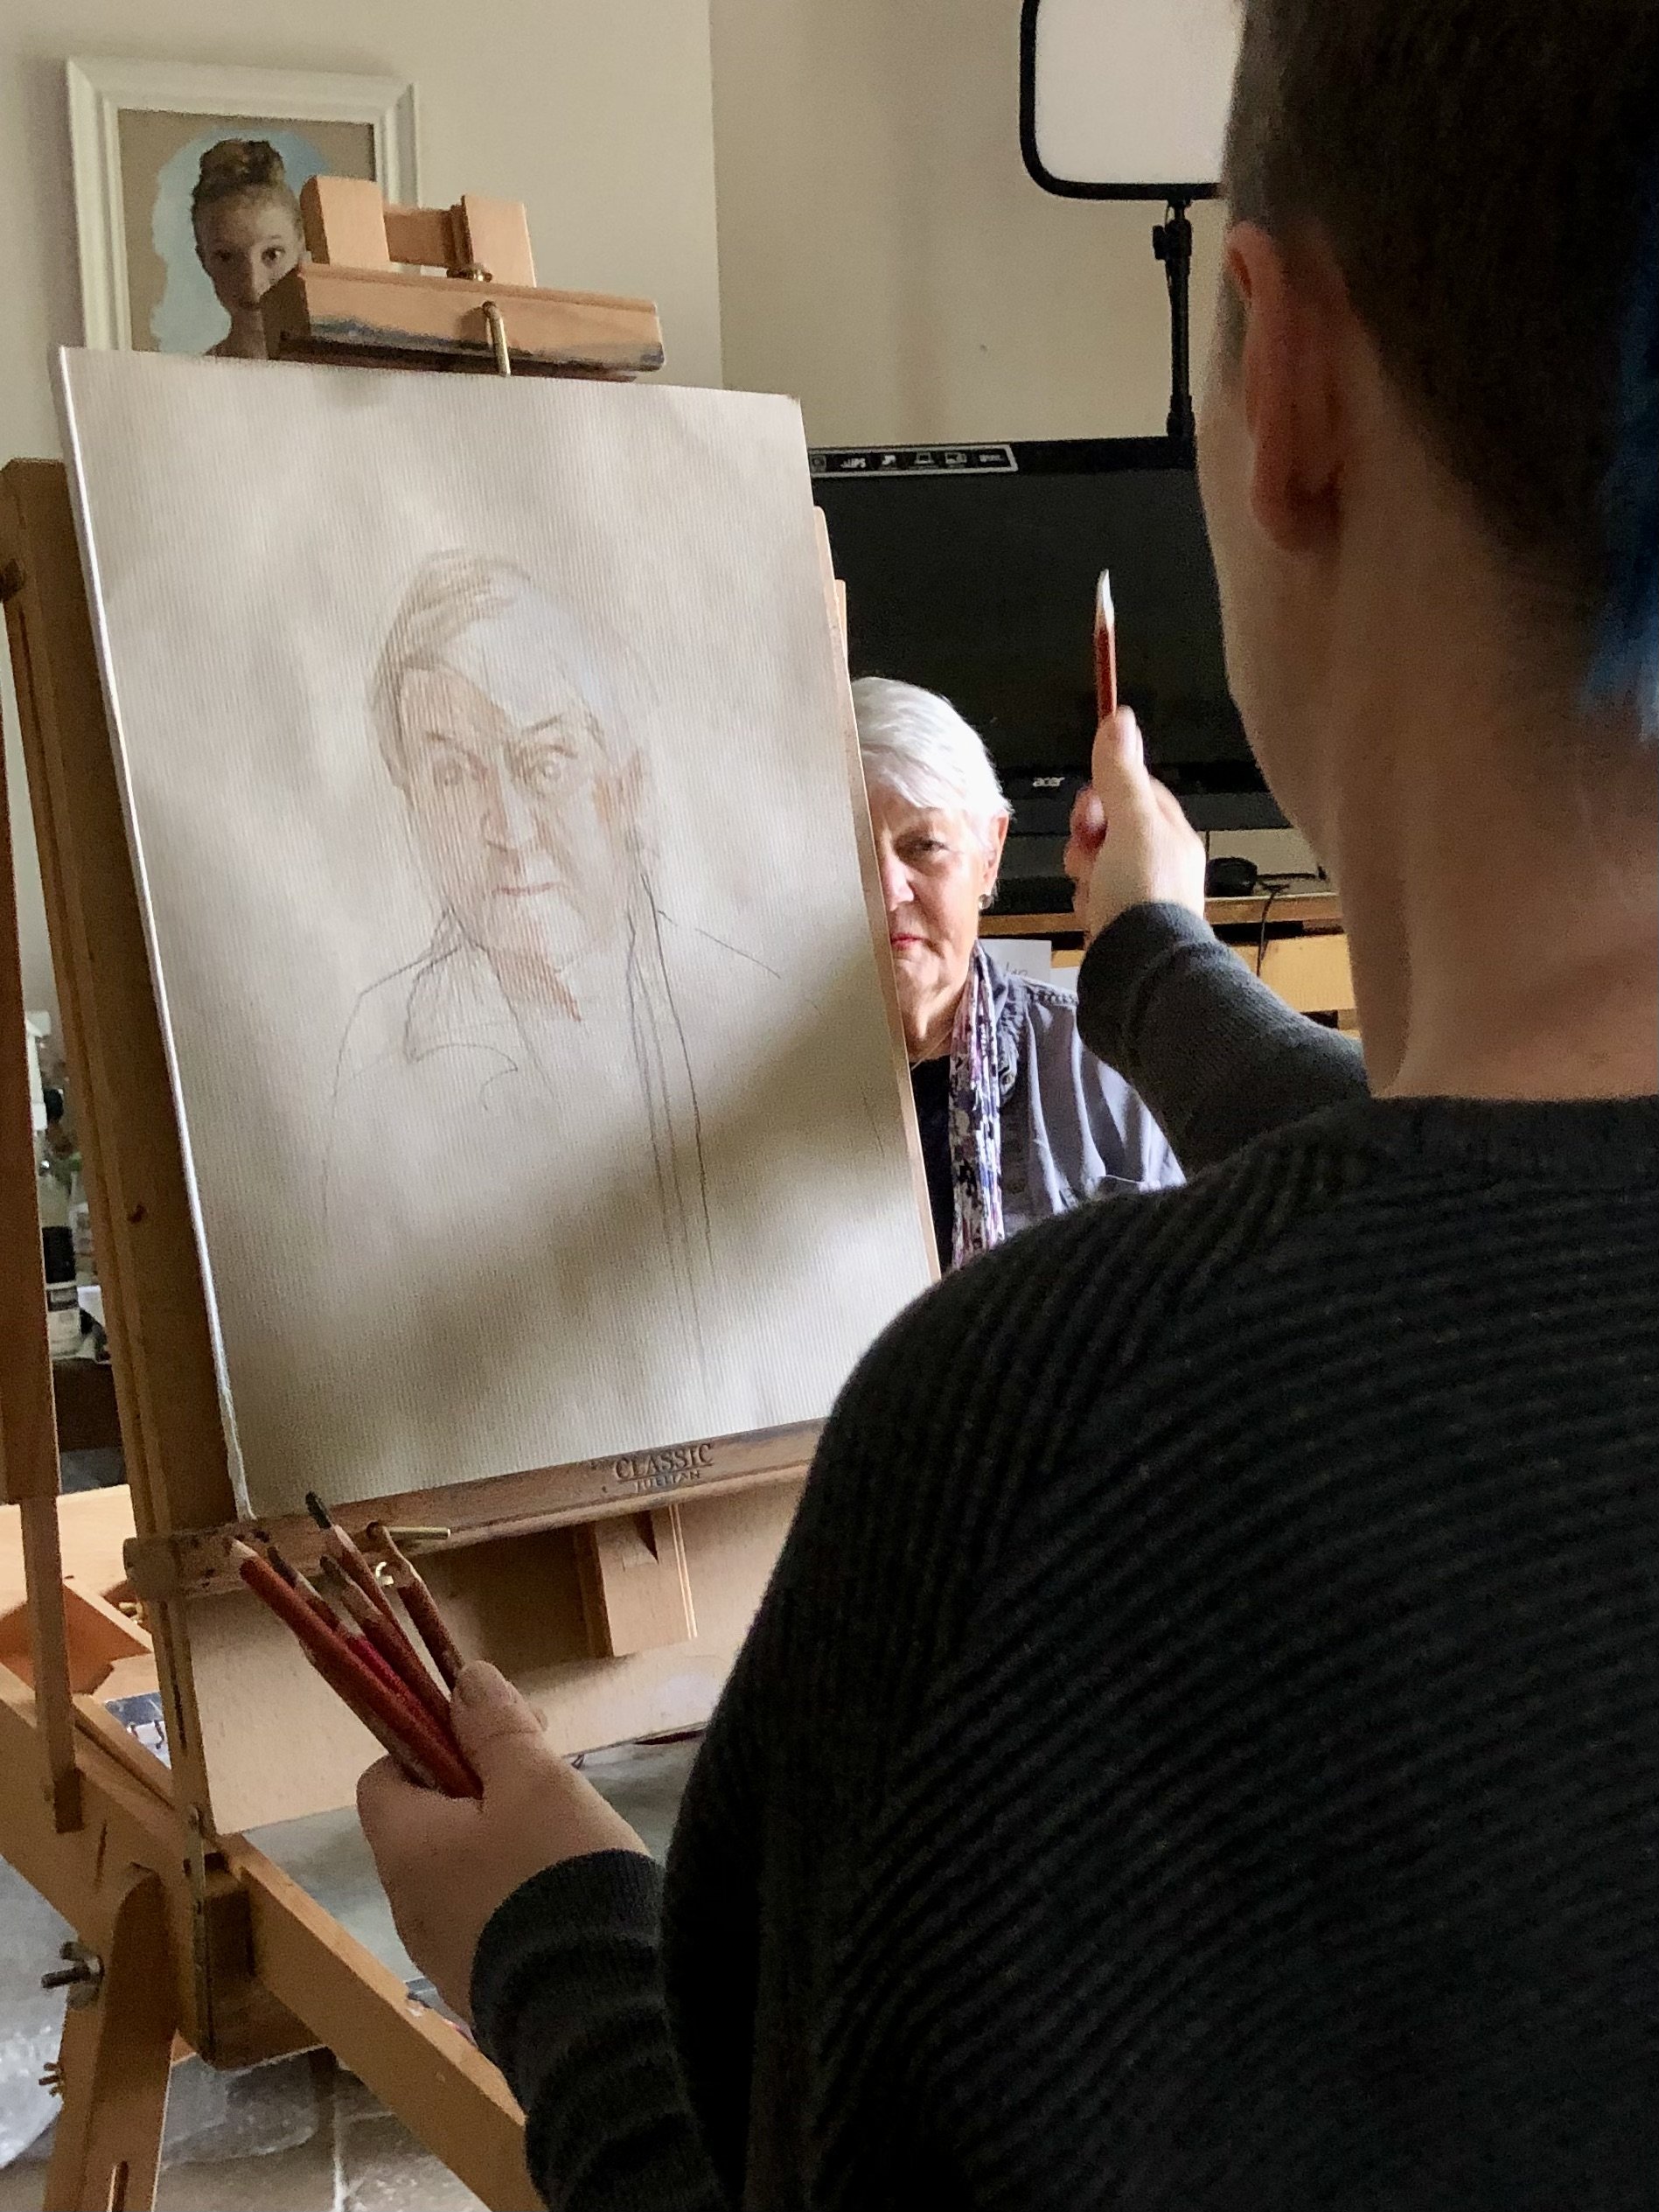
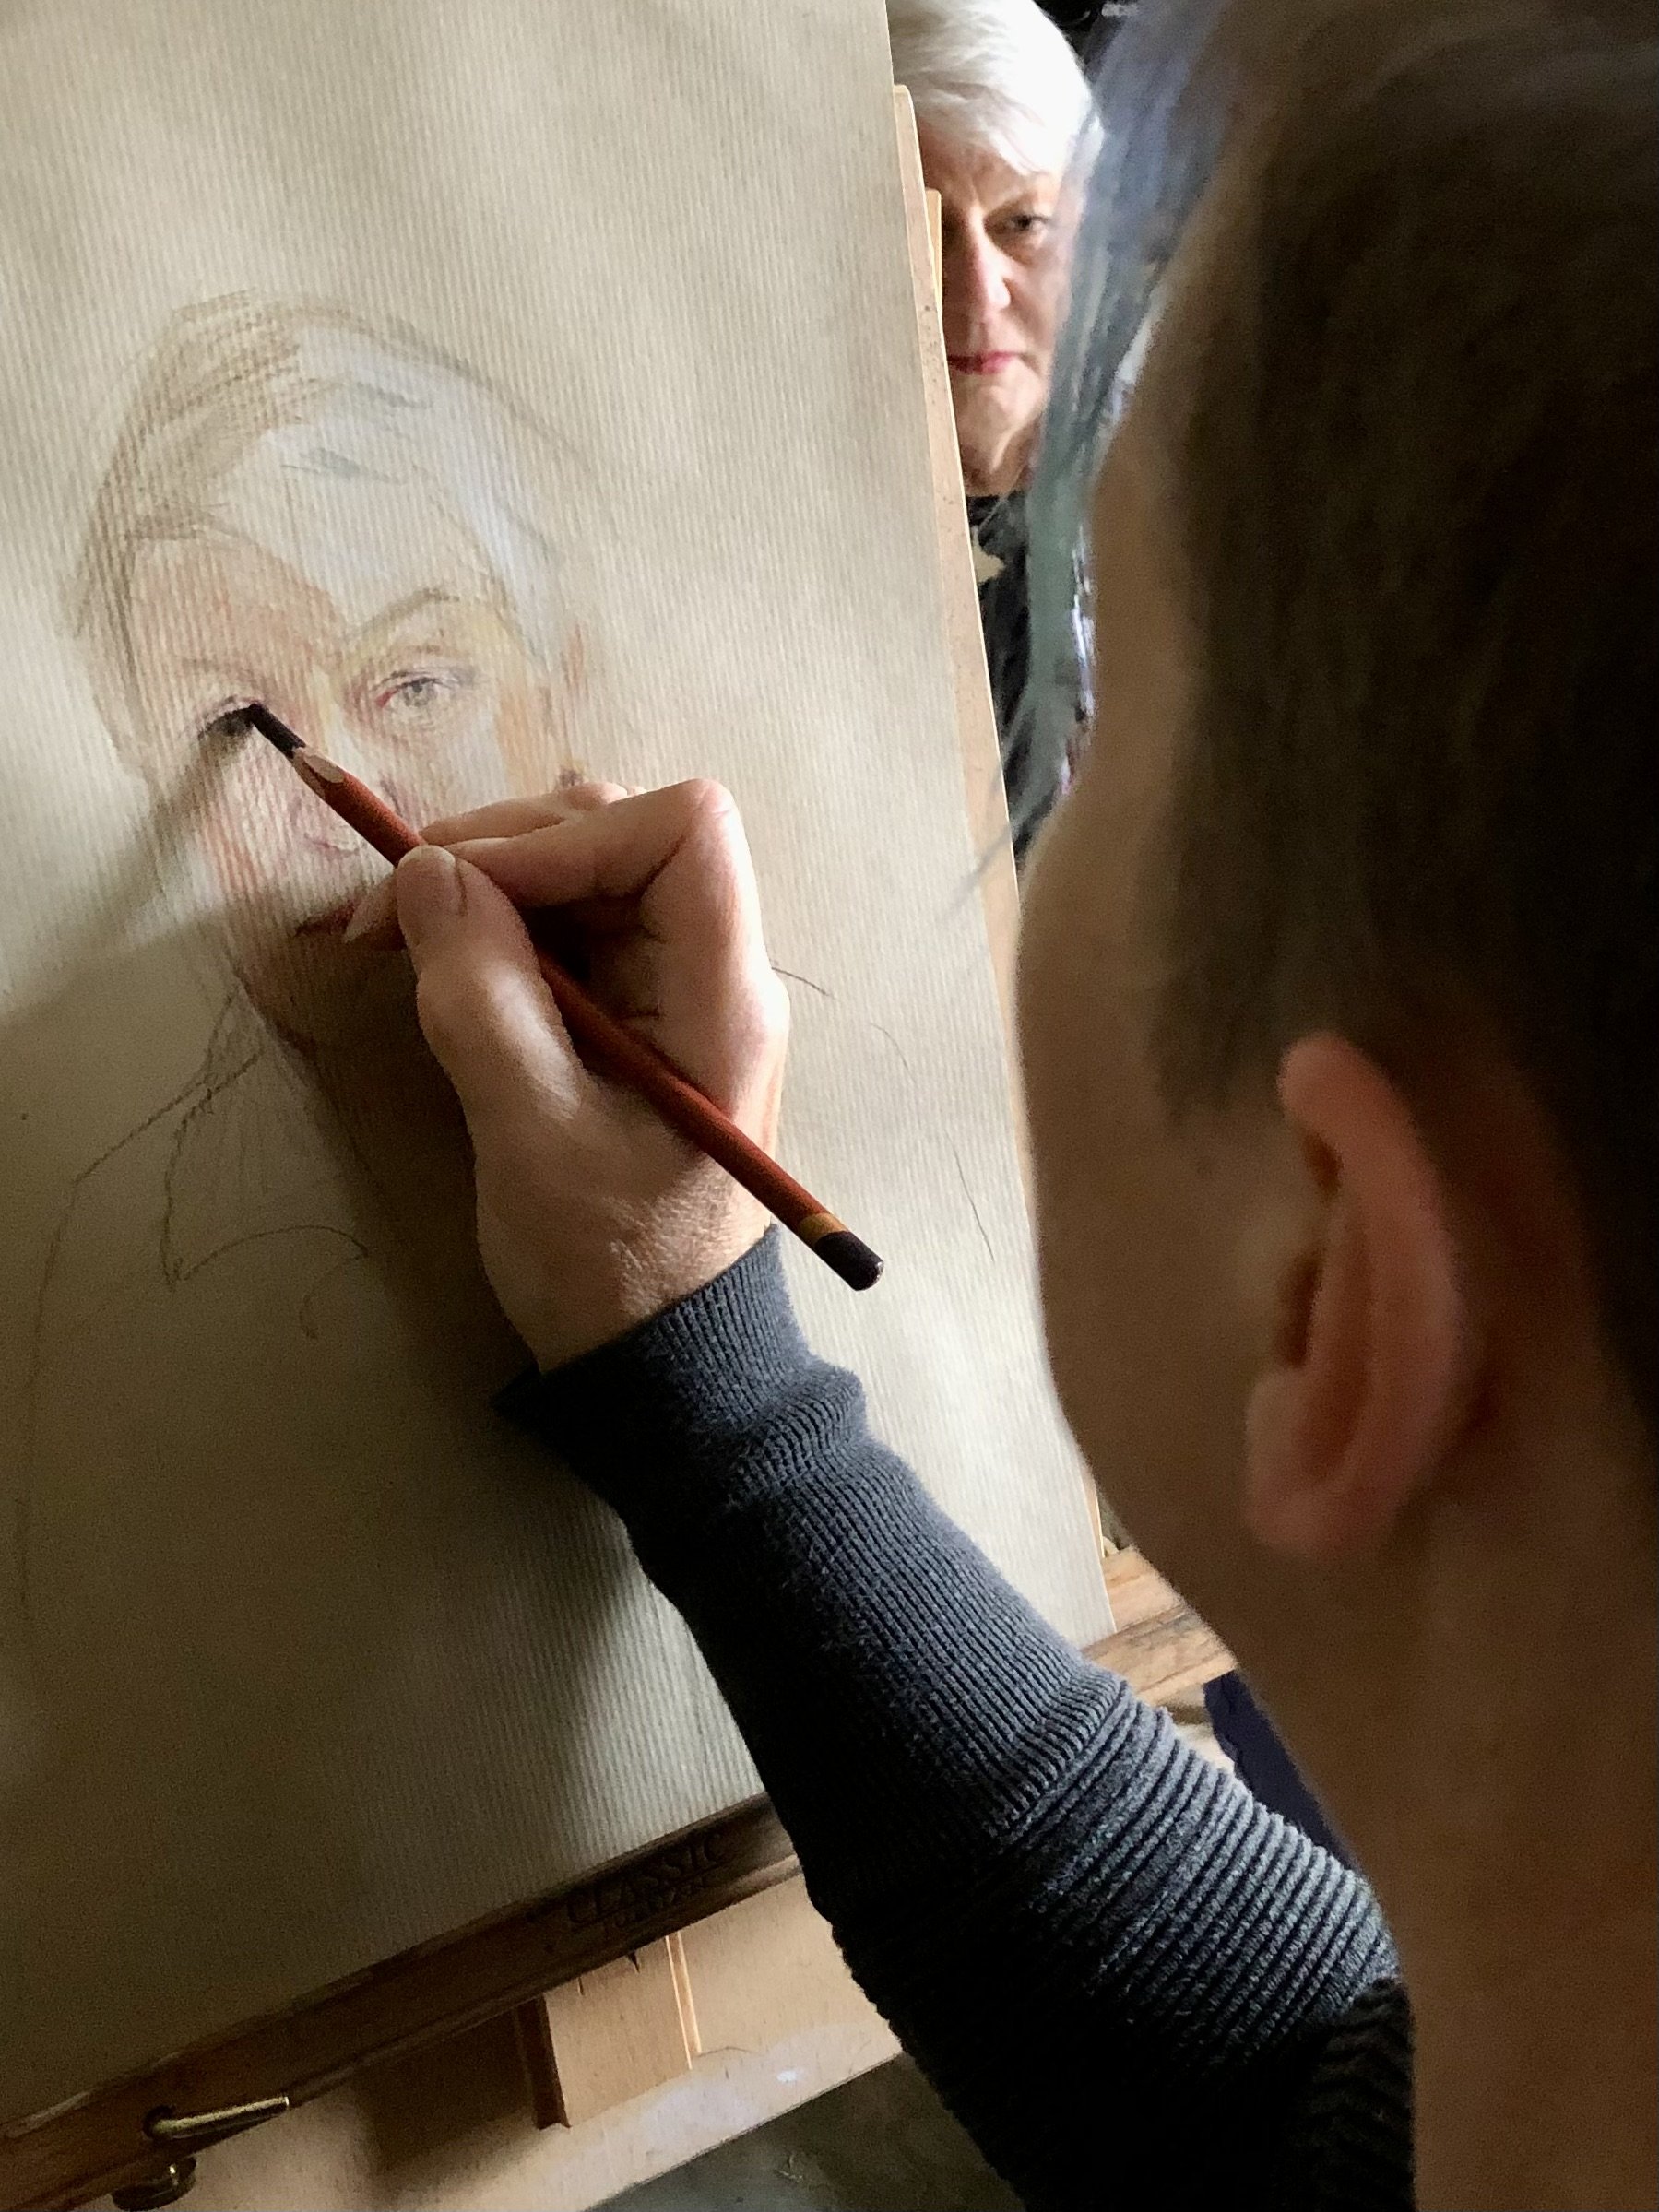
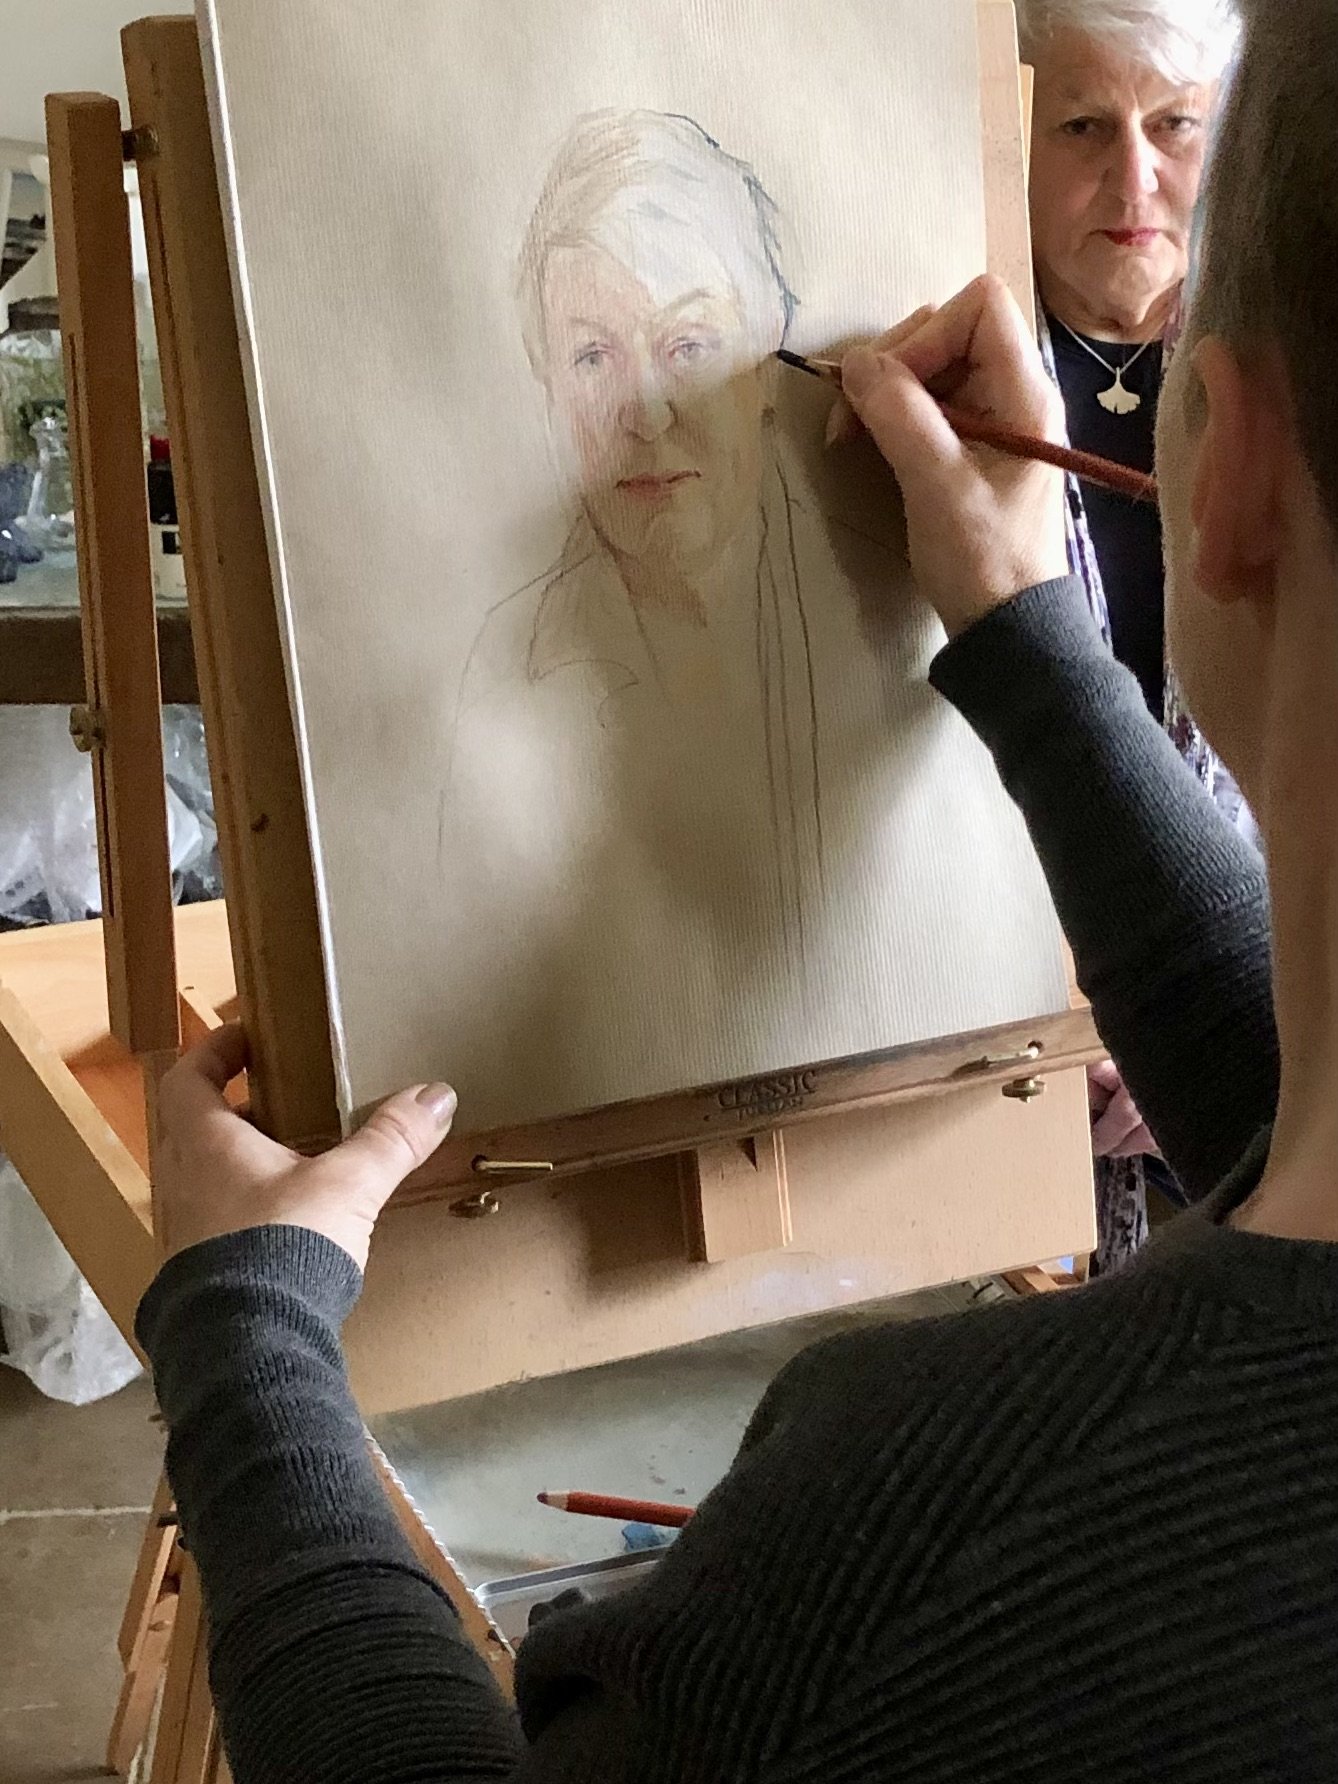
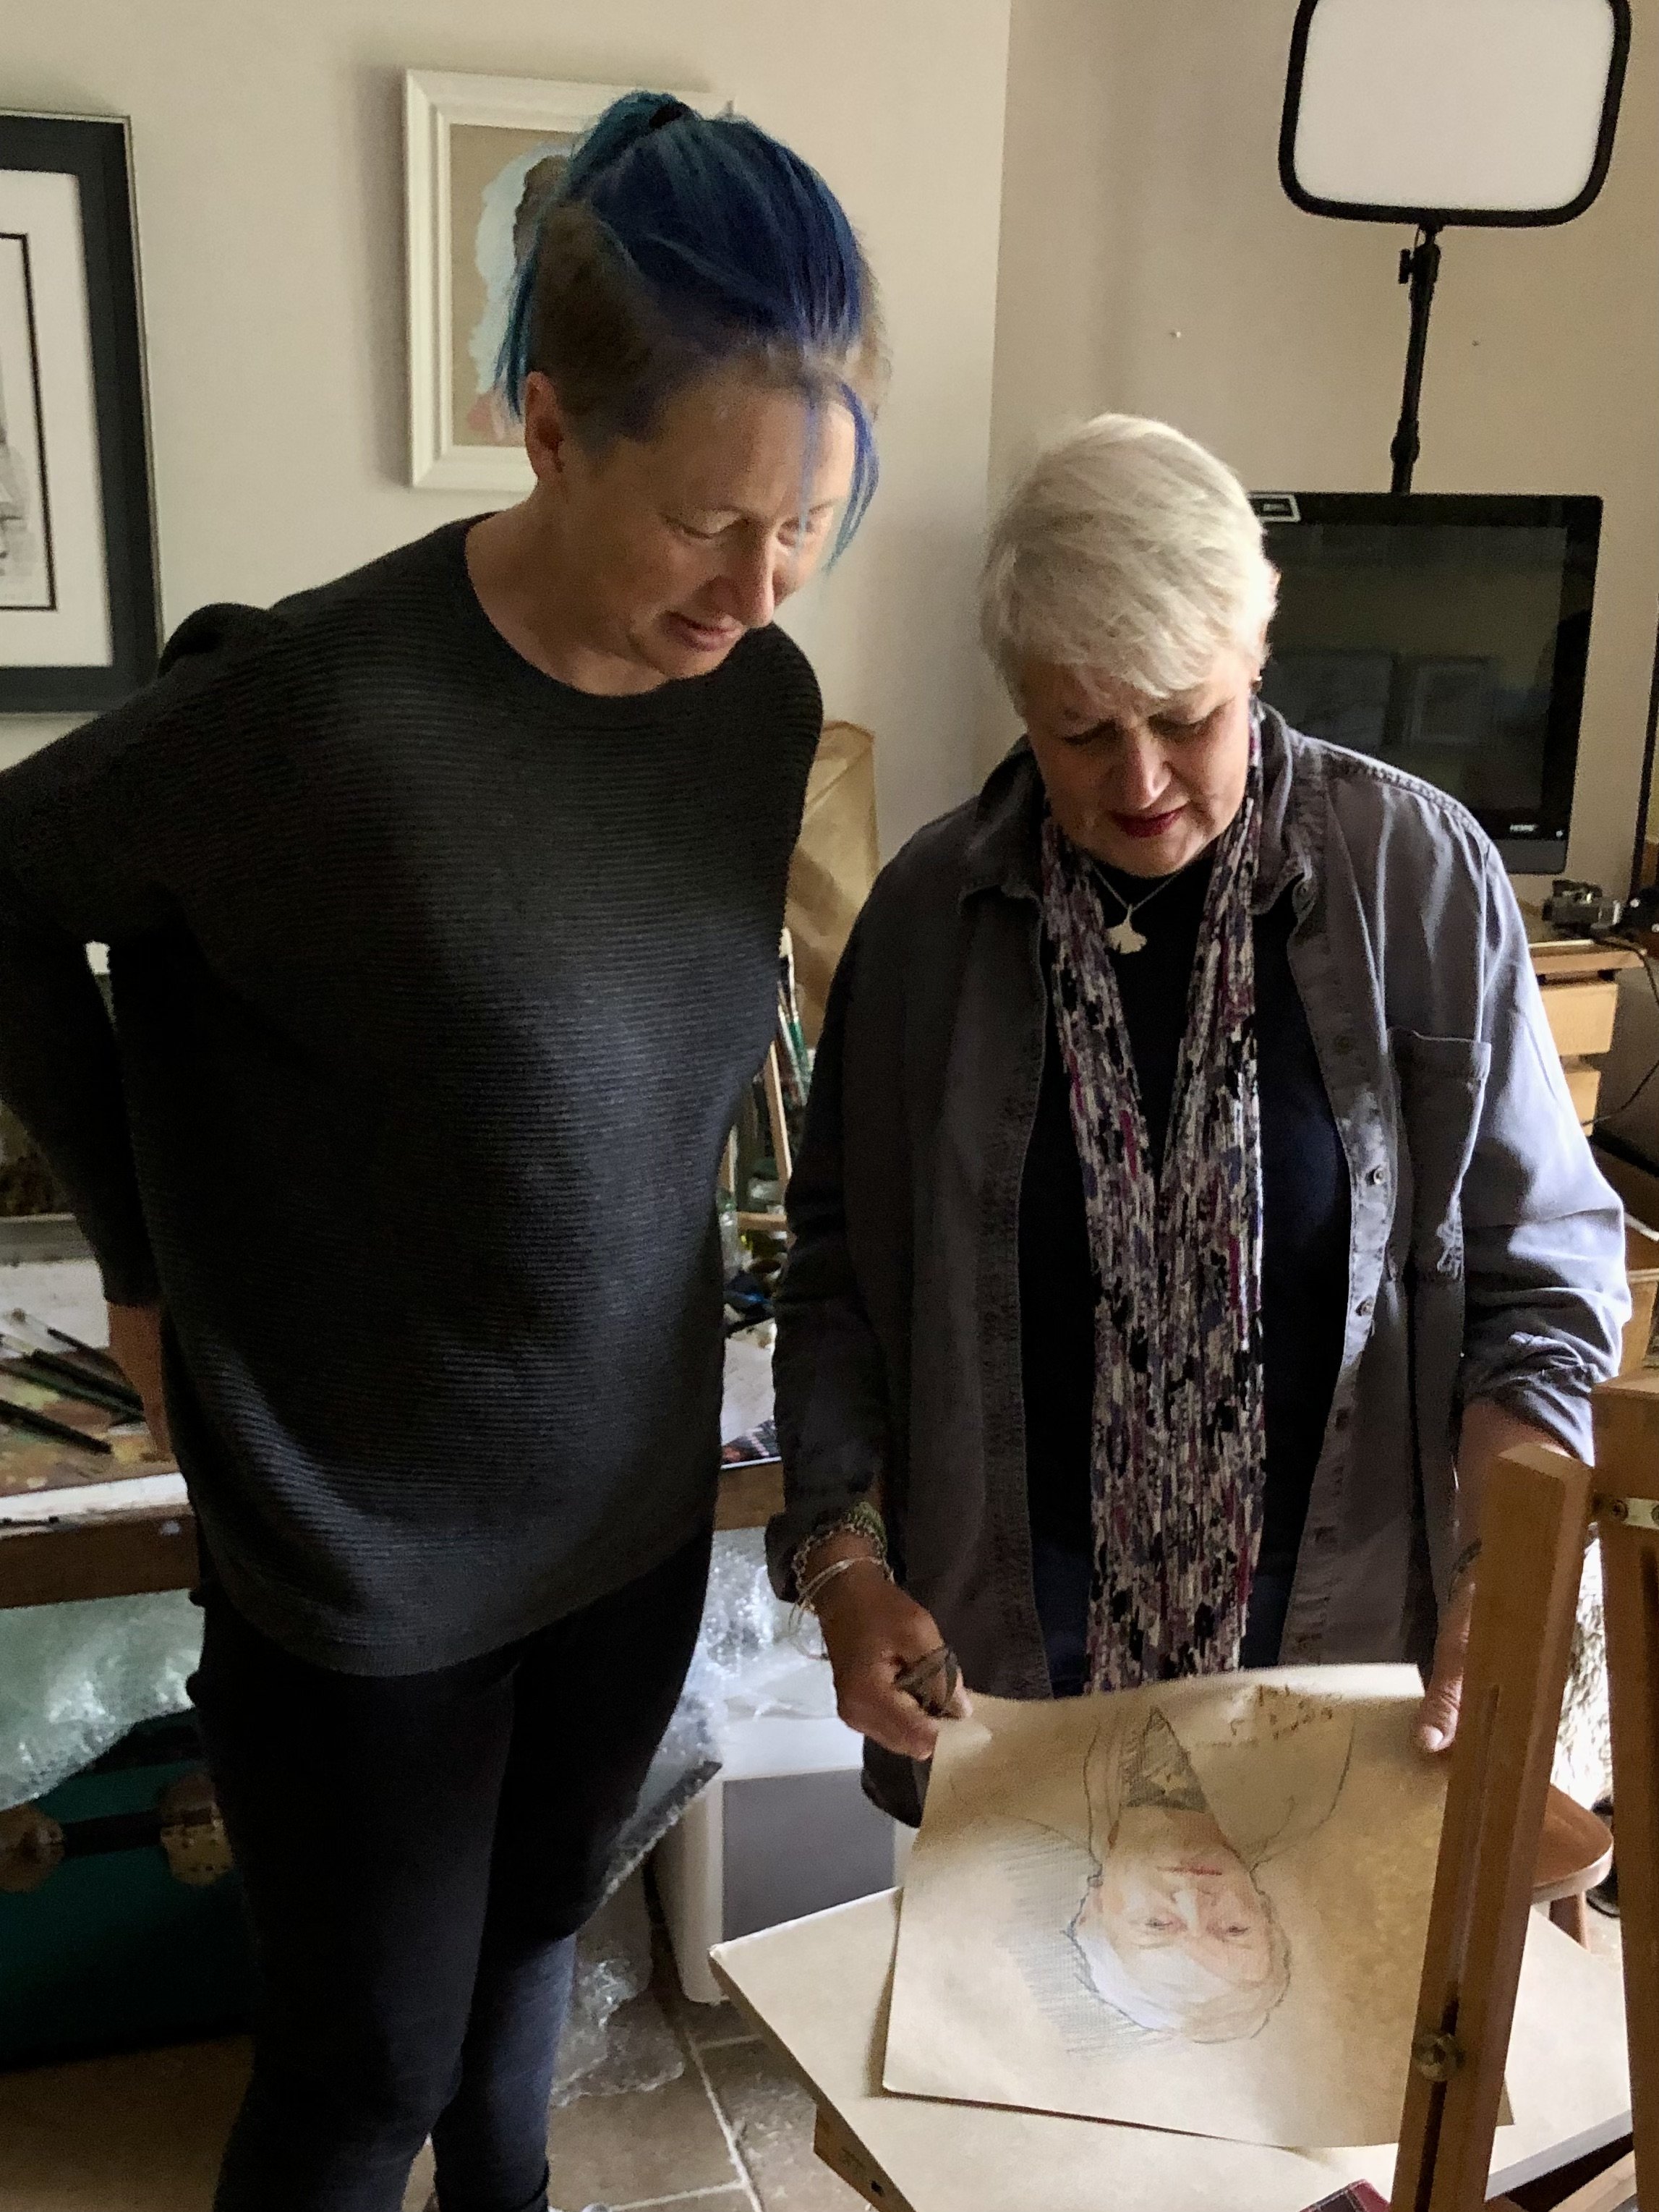
As a bonus, Gaby enjoys reportage photography, so she kindly shared progress shots, which I can use to describe the method I finally arrived at.
Tip 7 - setting up for good light & posture
Note my preferred setup - with strong natural light to the side. Using an easel means my hands are free to clutch pencils, and occasionally hold the mirror if needed.
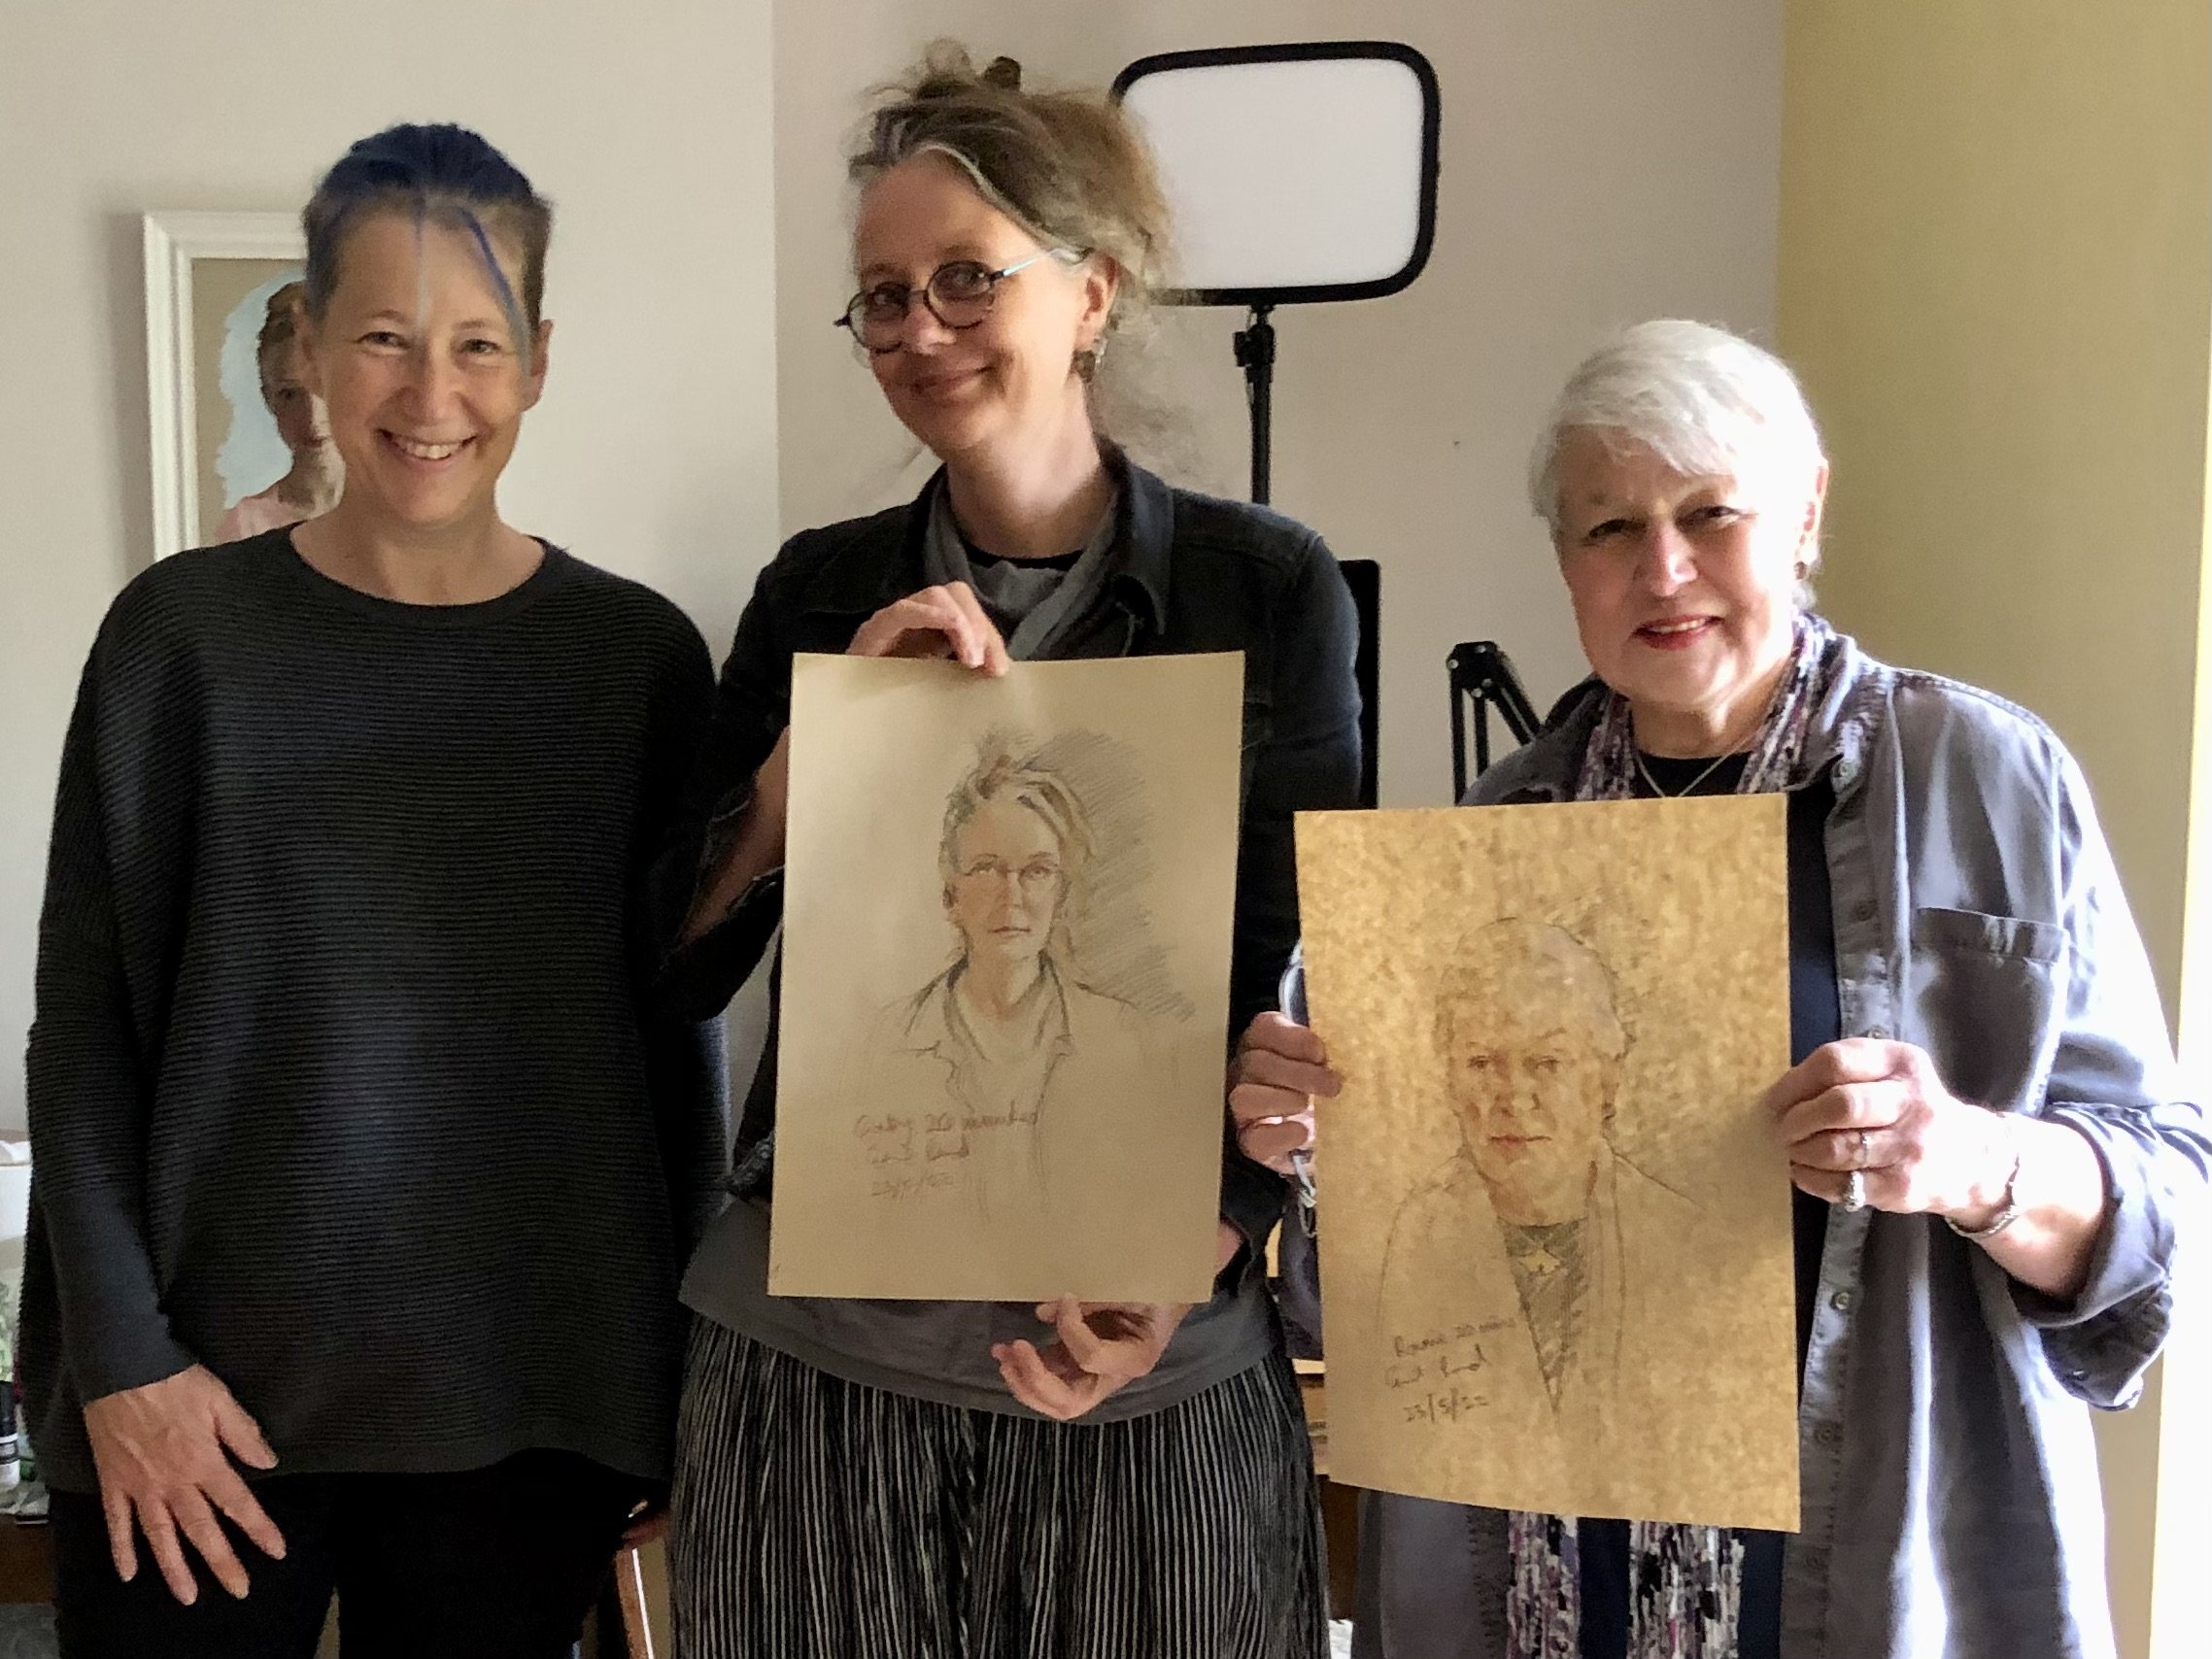
This intensive practice helped me take a step closer to an accurate quick likeness… there’s always room for improvement, of course!
I set off on the coach to the private event in London feeling ready. Suffice to say every single learning point described above proved useful. The sitters seemed very happy with their portraits, and it was great to see the different artists’ approaches. Seems there really are “many ways to skin a cat” - not that I’d dream of doing that!
If you’ve experienced being drawn in this way, I’d love to know how you found it. Do you have more tips, or a different method? Let me know in the comments.